Showing posts with label Wood. Show all posts

Saturday, 24 January 2015

SLA 3D Printer Project Log 12: Dropping the Hammer on lack of construction

You know that feeling when you've finally been liberated to make real progress on something?  In a sea of drudgery and busy-bodying in the real world, this is a shot of Dopamine straight to the brain.  This is even more so when you've been procrastinating something for so long that spiders the size of your big toe have set up ambush positions in your cooking utensils (as happened to me when I cleared out my shed; yes, my spine is Petri Jelly, no need to remind me...  *sigh*).

Nails, the classic solution for design ineptitude - that or excessive amounts of glue and filler!

The rush of finally taking action is, as we all know, the best time to find out we've been imbeciles – as I found out when I discovered my top vent had no tabs for locating the parts together!  I had basically expected the builder to be able to glue these together against gravity no matter which way up the join was being made.  Rest assured this will be fixed in the final 1.0 release, but for now, we can get busy with a Pin Vice (Check out the review here!).

If you think this is laborious, try correcting a hammer drill gone haywire...

As I examined the Z carriage to which the Build Bed is mounted to, I couldn't help but notice that there was a slight warp, a horrifying scenario for a part absolutely dependent on being straight and true!  At risk of making the Z carriage too heavy for the Stepper Motors, I knocked together a barn-door solution on a whim...  Unprofessionalism?  What is this, the Intel FABs?

Spare Extrusions fixed in place with Stud-Locked Nuts and Bolts; a nice solution, though I'd be lying if I said I wasn't concerned for strain on the Z motors.

Among the bits that I bought in a project-buying frenzy were some black, chunky tapes with a faint magnetic field.  These are for mounting the UV-Reactive Acrylic Window Panels.  TBH I'm a little worried about their powers of retention given that most ferrous things are barely attracted to them, but at least my Hard Disks are safe :)

Pro-Tip for those doing this:  Dampen the plywood surface where the ends of the tape meet, apply cyano, then affix.  Safeguard against peeling ;)

One final note is how we can expect the panels to be mounted; I've found some Slim T-Nuts for the extrusions that don't need to be slid in before the panel is aligned, so I can mount the panels after the frame is built – you can't imagine how much rage this will save!  On the downside, I've missed out on the chance to become the next Francis...

This thing locks against the extrusion when tightened, so no worries about it spinning in situ.

Locking in action, shouldn't too hard to remove them again.

Stay Productive...

Sunday, 11 January 2015

SLA 3D Printer Project Log 11.5: I hope paint don't watch me dry...

A quick update of the progress of my Printer:
  • Tallied up the parts needed and found I still had a great many detail parts to account for; frustrating, no?
  • Also need to get the Resin Basin lased - Is there some kind of standard way to mark a part of a drawing to indicate that it's scrap?  That would save the end user having to adjust for various laser cutters as he shops around the suppliers.
I managed to run a test using spray paint on the RAMPS mount, it's just standard DIY spray paint from Wickes (Satin White, looks glossier than I had imagined, then again I really ought to use primer):
Not too bad, but still got a lot to learn about spray painting.

It seems my overzealous application has soaked into the wood - a good start to preventing water ingress, but probably indicates that the two 400ml cans I bought will run out before the job is done.

I began the experiment with a teaspoon-full of tap water in the centre of the painted face:
It's being supported on top, a good start!
The reason I want to paint the panels is simple - I may not have the luxury of storing this printer in my house, which means it must either be placed in a garden shed or in storage, neither of which can be guaranteed to be completely dry.  Upon examining the part 1 hour and 30 mins later (3x the duration I had planned!), I was quite pleased to see this:
Same size, same shape - no water ingress!
As for constructing the frame itself, I plan to have assembled the Z Carriage, External Panels and Resin Basin before I dive into it, since their dimensions cannot be certain until they are fully assembled; using thread-lock is a must with the frame (it bears the weight, and we *cannot* allow the projector to be vibrated out of alignment), and I'd rather make things fit before the thread-lock sets.

Stay Experimental.

Thursday, 27 November 2014

SLA 3D Printer Project Log 11: Lasing on a sunny afternoon...

Exciting news on the making front:  my Laser Cuts have arrived!  Before I've even finished cutting my Extrusions (I'm a horrendous procrastinator), CutLaserCut of London have furnished me with 6mm Plywood Panels for the exterior; These parts have an almost psychotic precision to them - I drew these in Sketchup which draws Circles as slightly smooth polygons, and every face was sharply defined on even the smallest curves, running my finger over them felt like a D20 would if you felt it with your foot.

I reckon on a little show 'n' tell:

Clockwise from left:  Rear panel with PC Case and 180mm fan in place, Top Panel, Bottom Panel.
As you can see I stuck to fairly simple shapes for this, with lots of holes for the M4 bolts holding the panels on.

Left:  Front Panel; Right:  Both Side Panels (they're identical)
The Oblong bevelled holes are for the access panels which are to be made out of Fluorescent Acrylic (these absorb UV light, cuts out light pollution from external sources).

Another shot of the rear panel with rear-mounted equipment in place.
Of course, the fans will be internal and behind fan grilles once I assemble this thing, but the PC will remain external for access and cooling.

Misc Accessories, parts which make up things like the build bed (bottom left) and the Z carriage upper plate (top right).
The only problem I can see so far is the fact that many of the panels have warped, as can be expected for such thin plywood panels of this size.  It doesn't matter for parts other than the Z Carriage and possibly the Top Vent Cover (the rectangular plate with curved corners and all the cut-outs in), so I think I'll use Aluminium Angle bolted to the Carriage to ensure a level fixture for the Bearings and Threaded Rods driving the Z Carriage up and down.

"Why not use more plywood, or just glue on some Straight Scrap wood?"  Wood has a fantastic Strength-Weight ratio, especially Plywood, but ultimately while it can be very stiff, it is not that strong overall; The parts I use to stiffen can also warp which takes me back to my original problem.

Whew, an enticing delivery indeed, a glimpse into the future form of my Printer; just to end it on a high note, let us view this ultra-cute image of my bodged projector perched on it's mounting plate:

So far I've logged more hours watching youtube videos on this thing than it would be used for roughly 100 small prints!
Stay Industrious.

Sunday, 27 July 2014

SLA 3D Printer Project Log 10: It's Extrusive!

Aluminium Extrusions...  How could I have missed you so?  Such a simple way to build up frames, especially for prototypes; here I was about to spend £400 on laser cutting plywood into a rigid frame, as well as £160 for 3D Printed parts!

Advertising my stupidity is a good way to begin a post, no?  Just to prove the opposite, I'll divulge to you what I've got in mind thus far:

A fairly basic crate :)
As can probably be seen in this image alone, Aluminium Extrusions are essentially the Lego of the garage hacker, allowing rapid construction of non-standard frames and sub-assemblies by way of nuts which fit into grooves in aluminium bars, with bolts then holding it all together.  Compared to the previous laser-cut plywood design...  Actually, why not invoke an excuse to use bullet points rather than actually write?

Goods

  • Rapid addition of any newly-required features
  • The Projector Crane can be an integral part of the frame for additional strength
  • Plywood parts can be cut by hand - superb precision is no longer needed since it is automatically attained by a precision-manufactured metal framework

Bads

  • If a casing is used (as you can see, it is), you may have trouble upgrading to a bigger projector
  • Design is largely limited to right-angles
Not much on the bad side, eh?  Pity it's far from finished - the build-bed requires extensive re-working since I plan to only use laser-cutting for the Resin Basin (this part needs to be made so well you'd think I cast it whole) and I need to model all the brackets I'll need to assemble this thing.  All in all, not bad for a rediscovery made possible by a discussion with a colleague at work :)

Until we meet again...

Sunday, 29 June 2014

SLA 3D Printer Project Log 9: Call me tight-fisted...

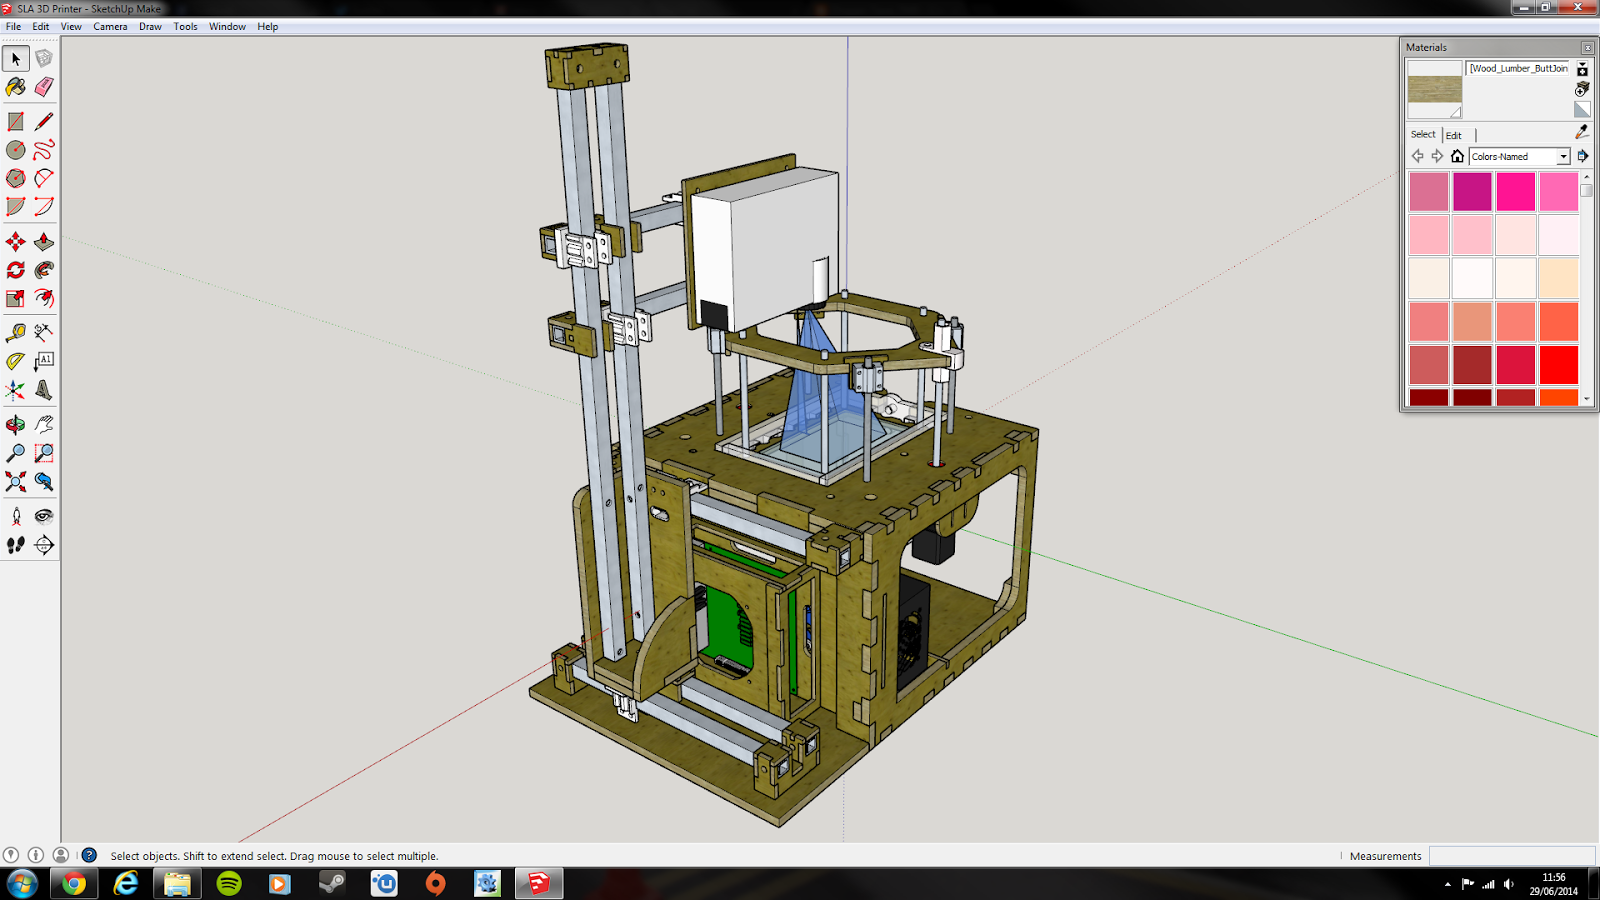
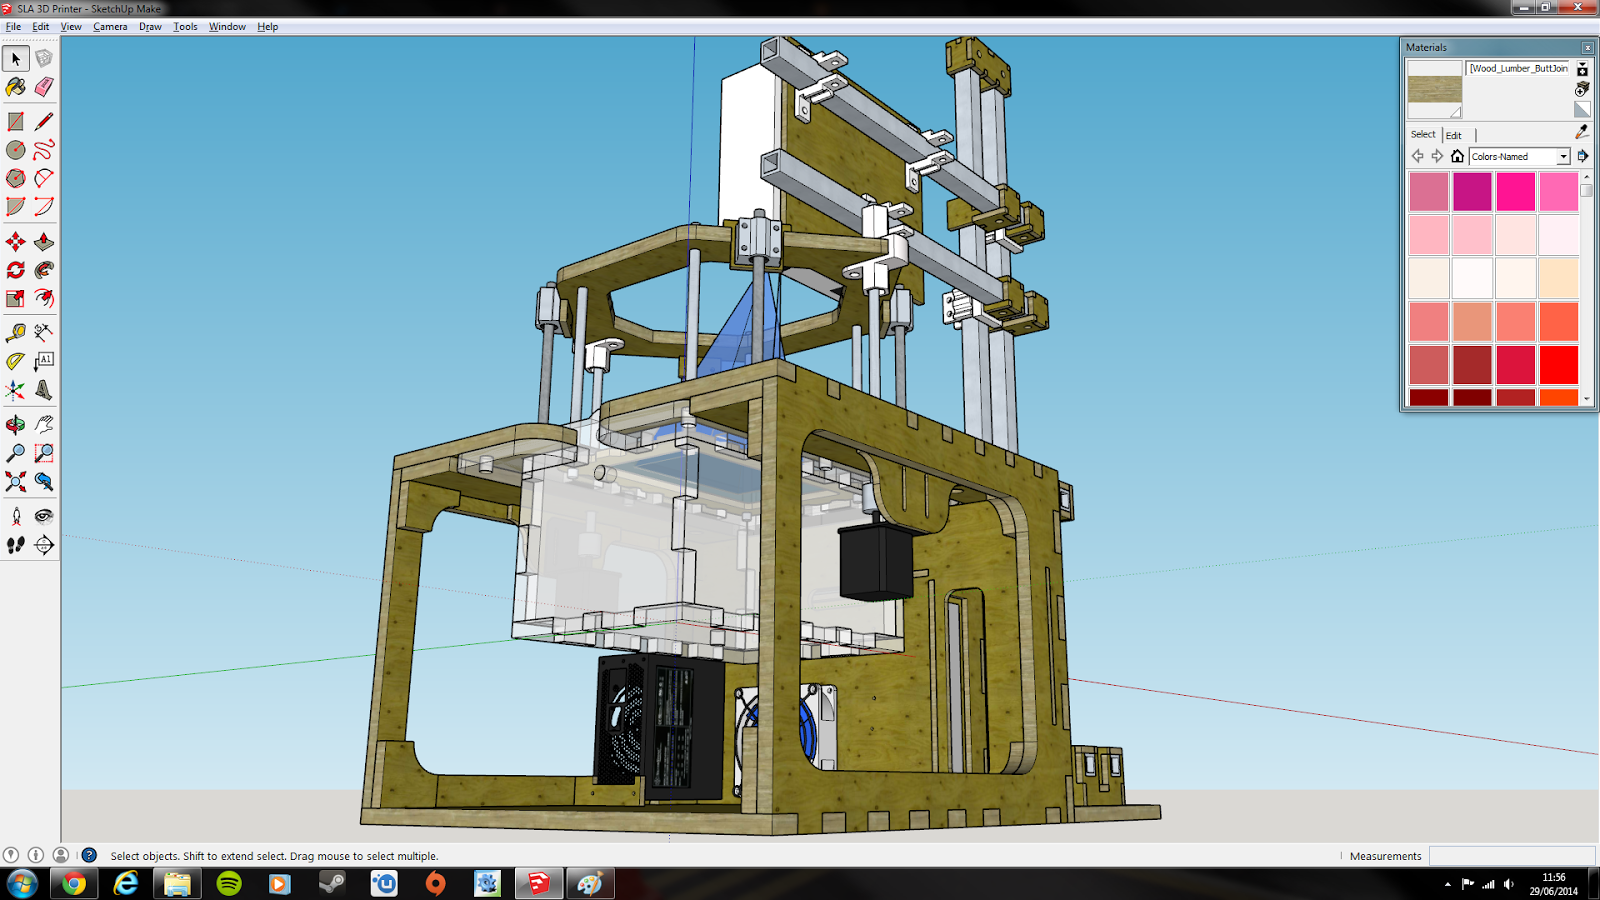
Been almost a god-forsaken month since I last posted on this!  Usual excuses apply - work, tiredness and other priorities.  Regardless of this, I am proud to present a completed model for the SLA 3D Printer!

Mostly Plywood construction to keep 3D Printing costs in check.
As much as I'm tempted to excuse the lack of RAMPs Board and some of the hardware (nuts, for instance), the simple fact is that I couldn't be bothered...
This is where the action is - looking down on the print bed with the beam set to 12.8 x 8.0 cm build area.
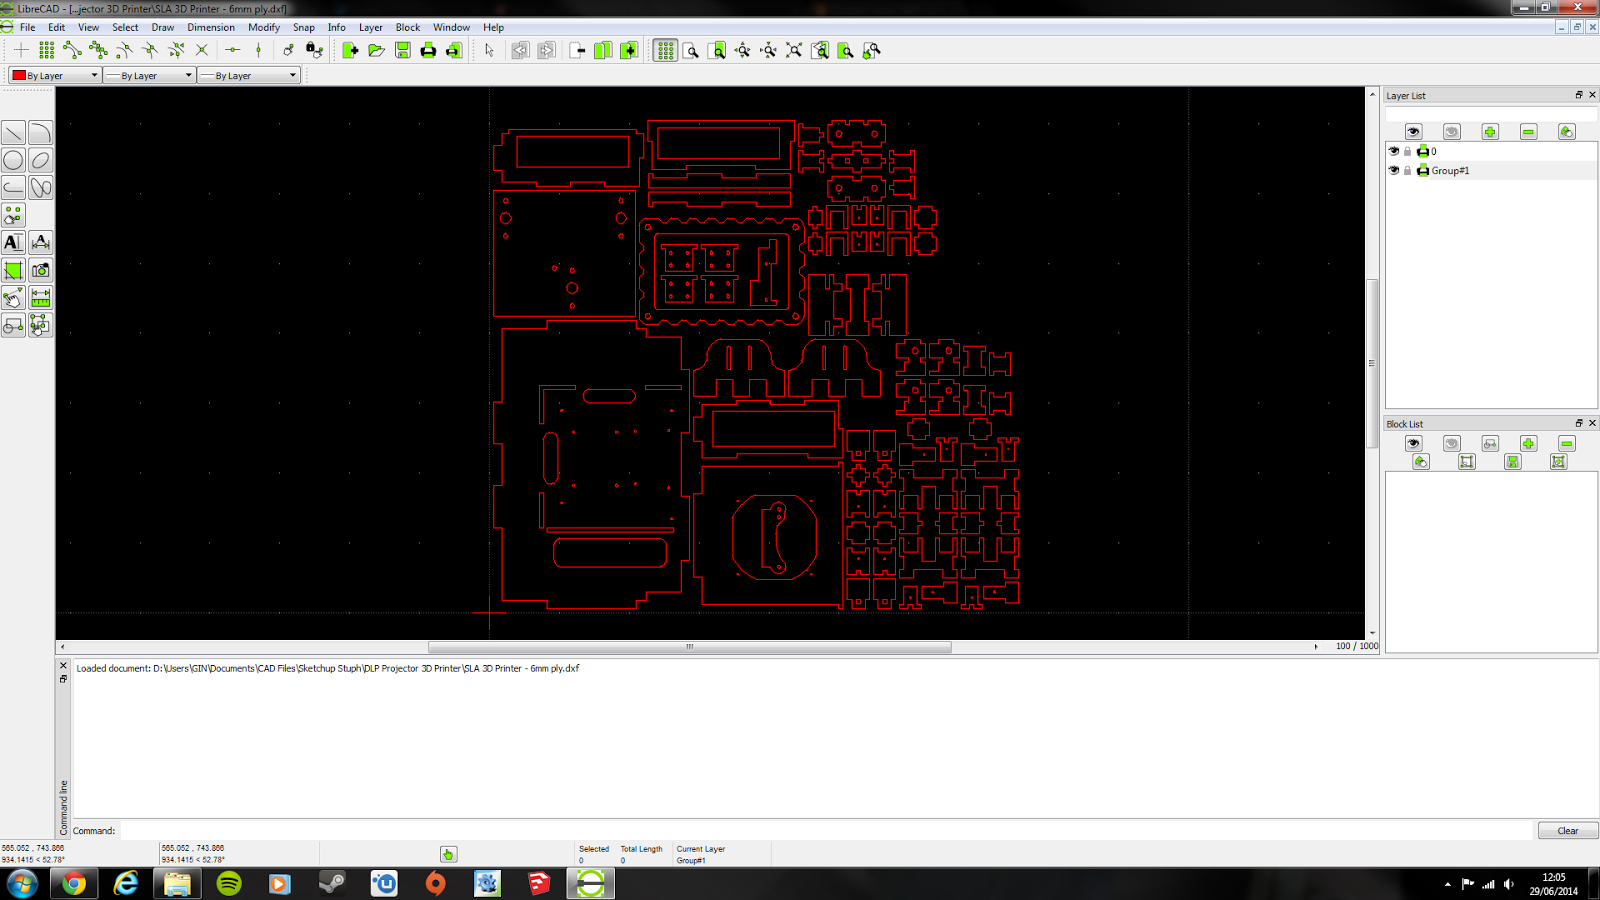
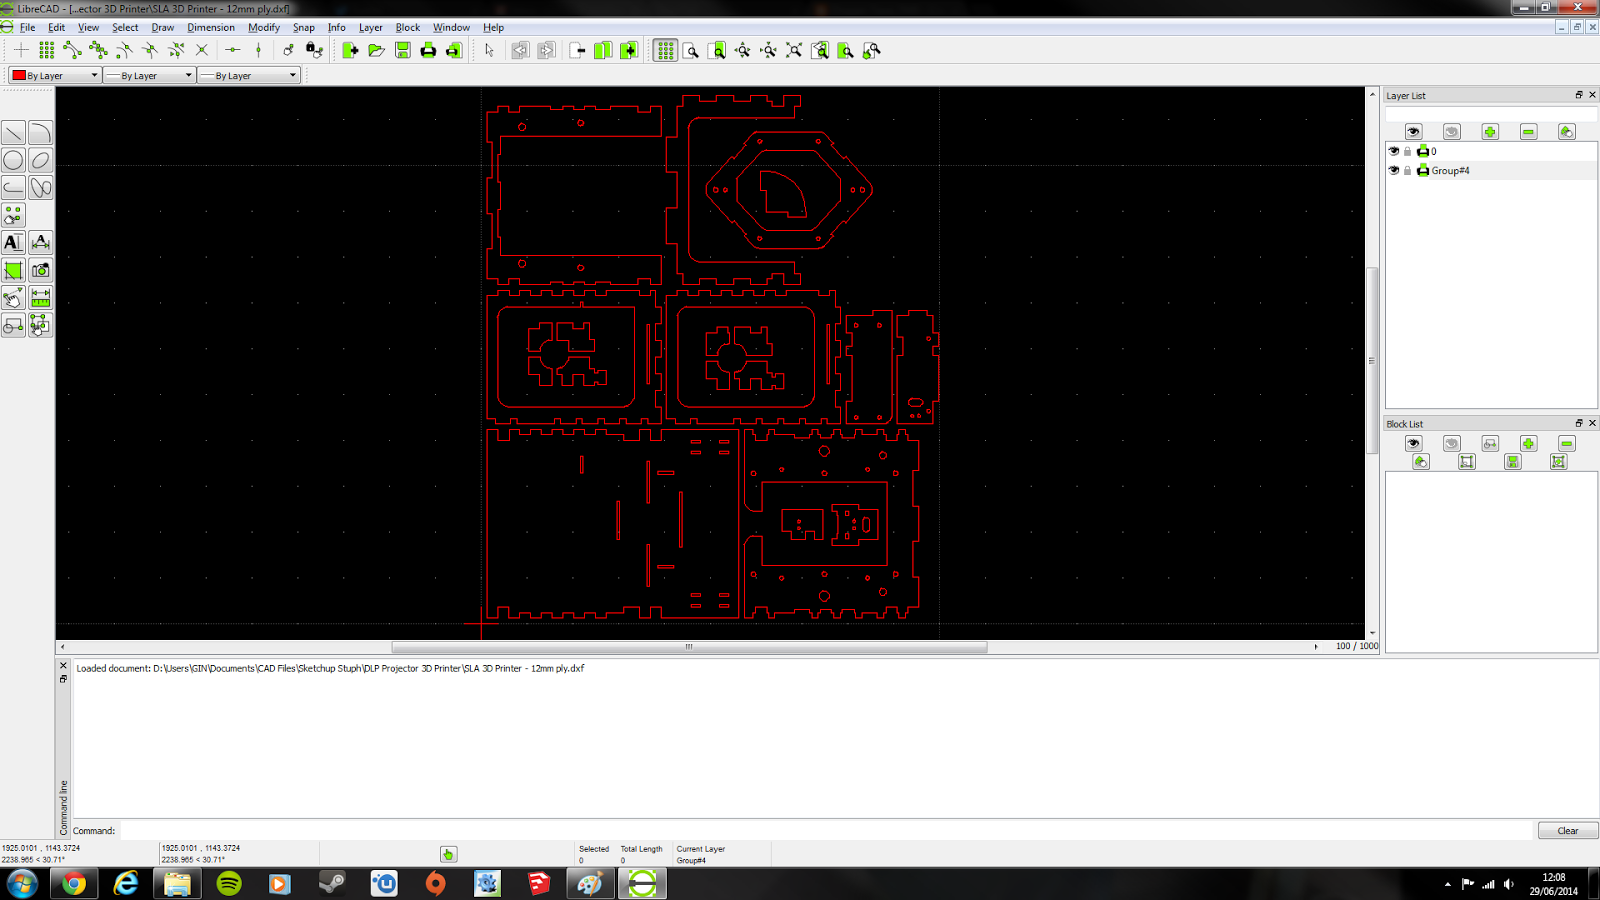
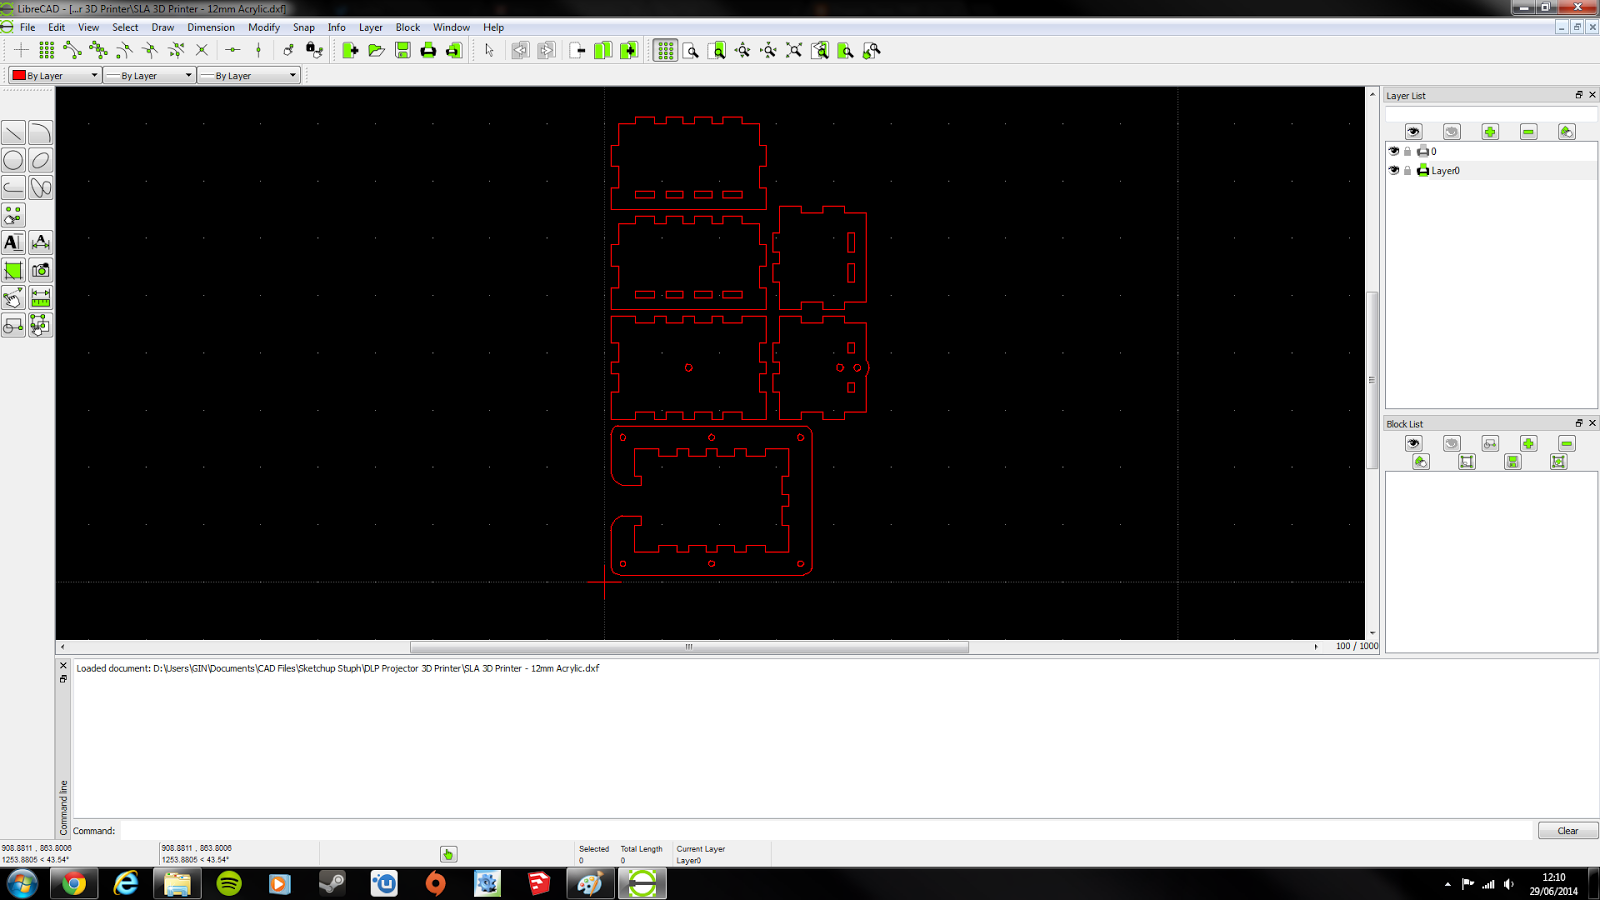
With this simple design in mind, let me take you through the DXF files for the laser cutting, which should hopefully let you know just how much goes into things like this:
25346.8mm of lasering goes into the 6mm ply parts ALONE.
Looks refreshingly simpler, but these 12mm ply parts still need 25260.6mm of cutting.
Finally, 12mm Cast Acrylic makes up the basin with a mere 8290.95mm of cuts.
Some of you may be thinking "Gee, that's sure to be expensive with all those finger joints and details" - how does £400 inc VAT sound?  Sure, it's a major expense, but would *you* consider doing this by hand?  All I need to do is persuade my ego to let go of that 4K monitor for just a few more months (not gonna happen ;) )

If you've read this post over at the life blog (to hell with re-writing the name here, that pubescent cacophony of letters needs to change), you may notice that I am aiming for change in the coming months not just with my blogs but my whole life - things are getting quite heavy for me and I need to re-tool.  The basic gist is that I am trying to do too much and it's driving me insane to the point where I just dive into PC Gaming and get nothing done, so a few things may have to come and go.  This project is here to stay (why not cut out the middleman for minor detail/operation changes?), but I'm looking into other avenues to try my hand that may eventually make me a decent living if I can pull it off correctly.

Finally, all my blogging is now on here, (pubescent jumble blog) is now mothballed.  Hope to see grasshopper-minded adventures on a much grander scale once this bridge is crossed.

Stay Industrious...

Saturday, 3 May 2014

SLA 3D Printer Project Log 7: Underframes? Thought I did those in Creo...

I've been working on underframes, I know, it's a bit soon to resume work on the wagons but I'm on about the mounting system for my 3D printer; until now I had components floating in space - not an ideal proposition for accuracy.  That has now been fixed, and I was in for some wake-up calls.

Don't worry, there'll be 10mm bolts holding the basin in place.
The dimensions were envisioned as a worst-case scenario of 1m3, which would give me plenty of wiggle room to add insane features like gull-wing doors and water-cooling for the built-in pc, but the dimensions as they stand now are 412mm x 380mm x 626mm.  I reckon I can now aim for a desktop model, and this means a few changes:

  • I'll probably ditch the case, and just use a black cover when not in use to prevent the resin from curing - this will probably save me a lot of bother when maintaining my printer.
  • A Mini-ITX PC is essential - I can no longer use the bulk of the unit to house an ATX motherboard.
  • Get more sensible with the design - I (and possibly you) am going to use this printer frequently, I need something serviceable.
  • Mounting the touchscreen just got a lot harder...

A few ancillary developments have happened in my life recently; I've got a new job at a composite manufacturer running cure checks for them, and one of the things I observed is that the Autoclaves run standard PCs alongside their massive built-in computers to run the UI; maybe I shouldn't follow the leader, so to say, but it gives me reassurance that my plan to use an x86 PC to control this thing isn't insane after all.

As much promise as the Pi had, I am not a coder, and Raspbian didn't run how you'd call slick (Risc OS did, but it doesn't support wireless internet which makes things a hell of a lot harder these days); if I'm going to use it everyday, which I may do for a few weeks of each quarter, I'd prefer a rapid system as well as one which has a GUI.

I intend to install Windows 7 Basic to run Creation Workshop by PacManFan, a program which can slice the STLs as well as operate the printer with the help of RAMPS board.  This program uses little CPU power, so the Pentium E2160 I possess can be used (I bought it for a secondary gaming rig, to use whilst home from University), but it does use a lot of GPU power in it's Model View, which runs on OpenGL; I bring up OpenGL because it means that Workstation Cards, designed largely for OpenGL-accelerated CAD programs, could give stellar performance.

I'll expand upon this further when the time comes, I'm getting tired in one of my few windows of time I have to do CAD and blog, in spite of the much-needed money.

Regards.

Tuesday, 1 April 2014

SLA 3D Printer Project Log 4: A projector mount with traversing features, potential as a garden railway traverse table?

Aside from experiments in salt, I have been working on a mounting method for my projector; one which offers versatility both in terms of adjusting projector distance to vary the build area/resolution balance and also to make way for projector upgrades.  Given that I am building a top-down design this is no easy task considering that gravity threatens to either collapse my construction or slowly inch the projector down and out of focus.  So far, this is my design which as of yet only features the vertical axis:
Looks very Reprappish, and that's because it is :D
I am keeping to Reprap parts as much as possible since every 3D printing enthusiast and their Budgie has a Prusa Mendel of some kind, so relevant parts will be cheaper; the central rod is a M8 threaded rod and the other two are 8mm plain steel rods for support and guidance, SCS8UU bearings are used throughout due to their cast metal housing and built-in M4 threads.  Another thing to note is that the Traverse Plate (highlighted in green) is not what will carry the projector - I intend to make another plate bespoke to the mounting requirements of my projector and users can make bespoke mounting plates for their respective projectors.
The bearings for the horizontal guide rods can clearly be seen.
The Backplate may look a bit skeletal for some, but this is made out of 12mm plywood; 6mm plywood may be used to allow for simplification of manufacture with other parts like the Traverse Plate, with 12mm parts made of two 6mm parts epoxied together (this also allows for half-engraved features without half-engraving, which could bring potential de-lamination issues to a single 12mm sheet).  The large amount of space also allows for a high degree of nesting to occur, saving material and space on the laser bed.
Trusses added for stylistic reasons ;)
This is the mounting cross for the Traverse Plate, where the plate interacts with the M8 rod to allow the plate to move vertically; this is done via two M8 nuts located in slots (just visible above), of which one or both may be a nylock nut to provide friction when traversing is not required.  This is made from a 12mm (or 2 x 6mm) plywood cross which interfaces with a 3D printed nut mount to create the mounting cross.
Reprap inspiration is found again...
Finally, we have the clasps for the plain steel rods that guide the Traverse Plate.  Not much to mention here other than it's 3D printed, I've decided to use Shapeways for my prints since it's WSF printers offer almost infinite flexibility in the shape of my objects within reason and my Reprap is giving me constant trouble right now, so much for saving money by printing at home :(

Good news is that design should be straightforward from here, since I only need to replicate the parts I have made here in the horizontal axis with a few minor tweaks.  Pity this is only one of five sub-assemblies I am slated to design (Projector Mount, Resin Basin, Z axis with build plate, the Mounting Frame and the Case).