Tuesday, 10 February 2015

The Festival of British Railway Modelling: A Highlights Reel

Choosing a favourite...  who knew that a task that sounds so natural to do becomes a torturous, self-flagellating exercise in choice?  Perhaps this is why those whohave recently fallen under a dictatorship chant “we are free from freedom!”

Of all the BRM shows, the Doncastrian event has a distinctly British flavour (with the horrendous grease thankfully remaining in our nation's food); they say that when you participate in a Smorgasbord, you leave hungry; and with that in mind, Tawe TMD brings you it's top 5 picks from the show.  When you consider that the TMD is focussed on railway modelling, the funny thing is how my favourite layout of the show celebrates the simple trainset:

1. Newbie Bridge


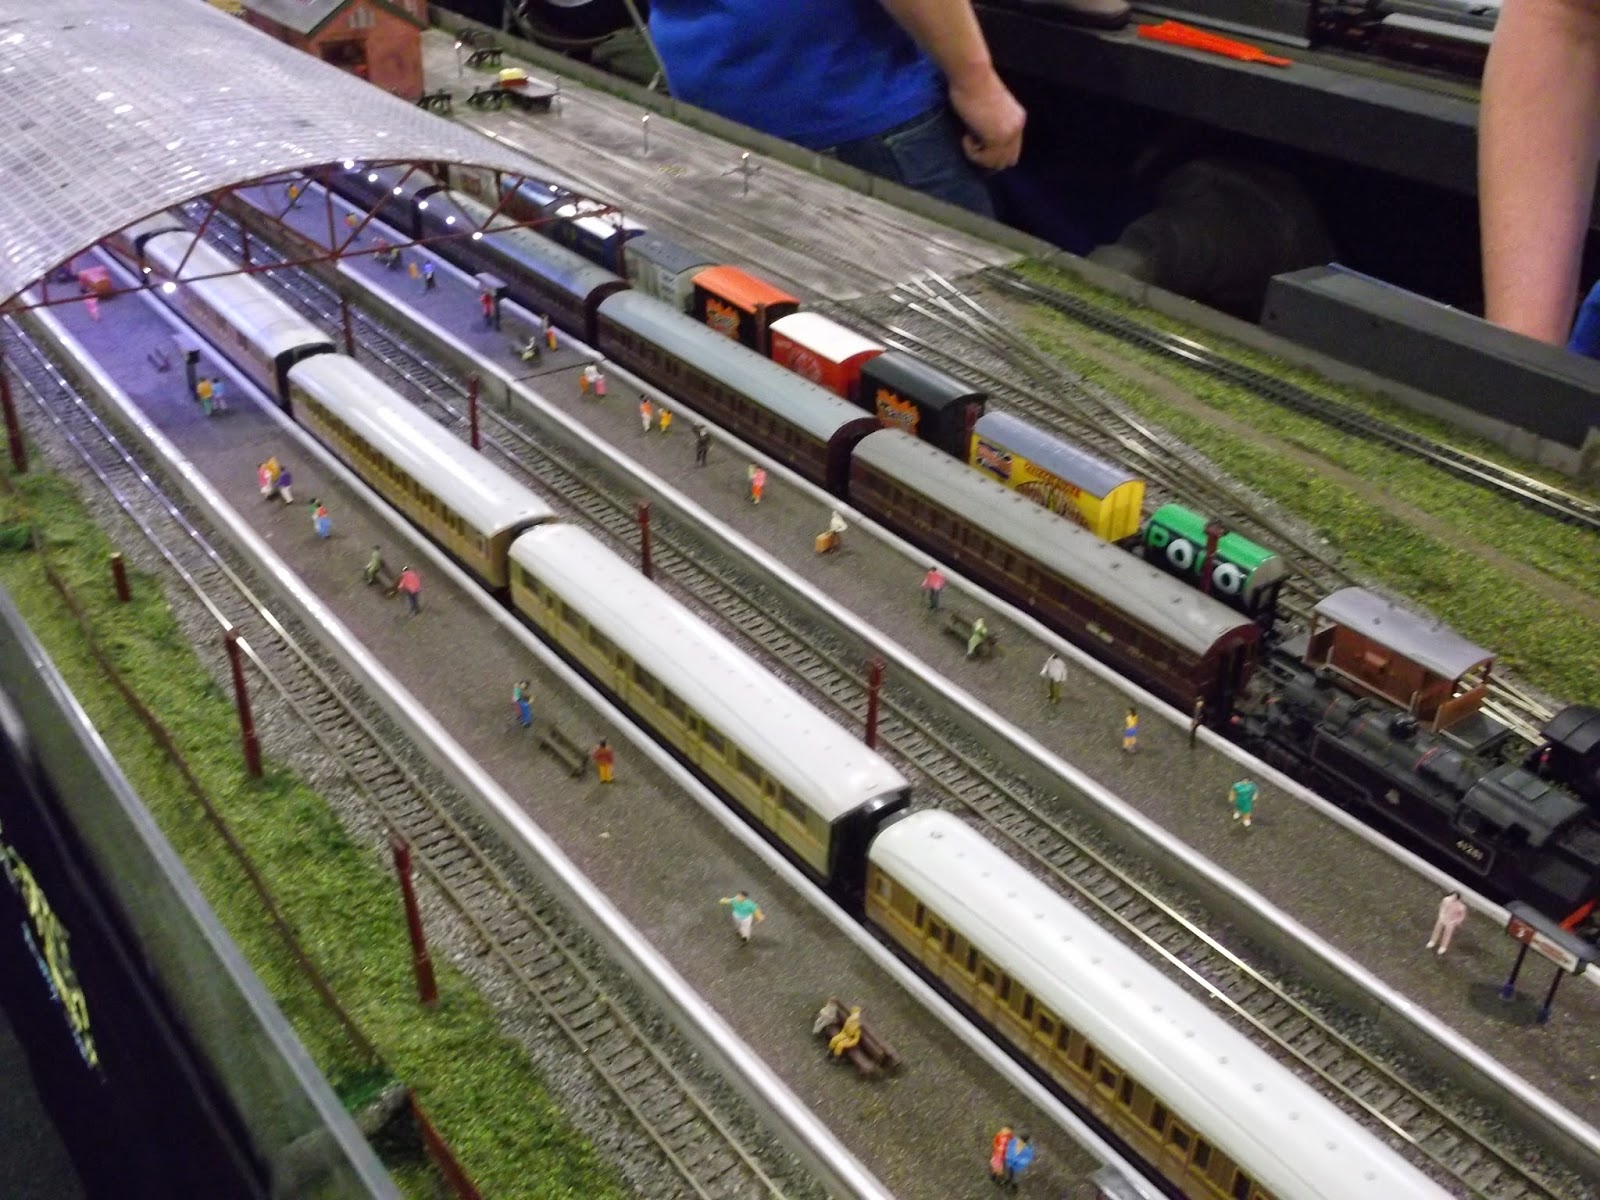
Setrack all around, not a gradient in sight; yep, it's a trainset all right!

No gradients doesn't always mean no verticality :)

A train made up of trainset product placements?  How do I know I'm not in childhood again?

Metcalfe Buildings look damn good considering they are made of printed card.

Newbie Bridge seems to be everything amateur condensed into a small room – all that's missing are the standard hornby controllers!  But look closer, what is the objective of our hobby?  Why do we put months and months into incredibly thorough research and construction, in between our jobs and social lives, mind, to put some plastic things on a table?  Why, to capture the spirit of railway life in that region at that time!  We fuss and fuss over grains of dirt on the springs of our wagons, to condense the atmosphere of life onto an 8x4.  Why can't we do this with the essence of a trainset?  Arguably the number one fixture in our childhood homes that propels us into the hobby to begin with.

Here's to Newbie Bridge, for showing us that sacrificing atmospheric charm to the altar of realism does not a great layout make.

2. Stoney Lane Depot


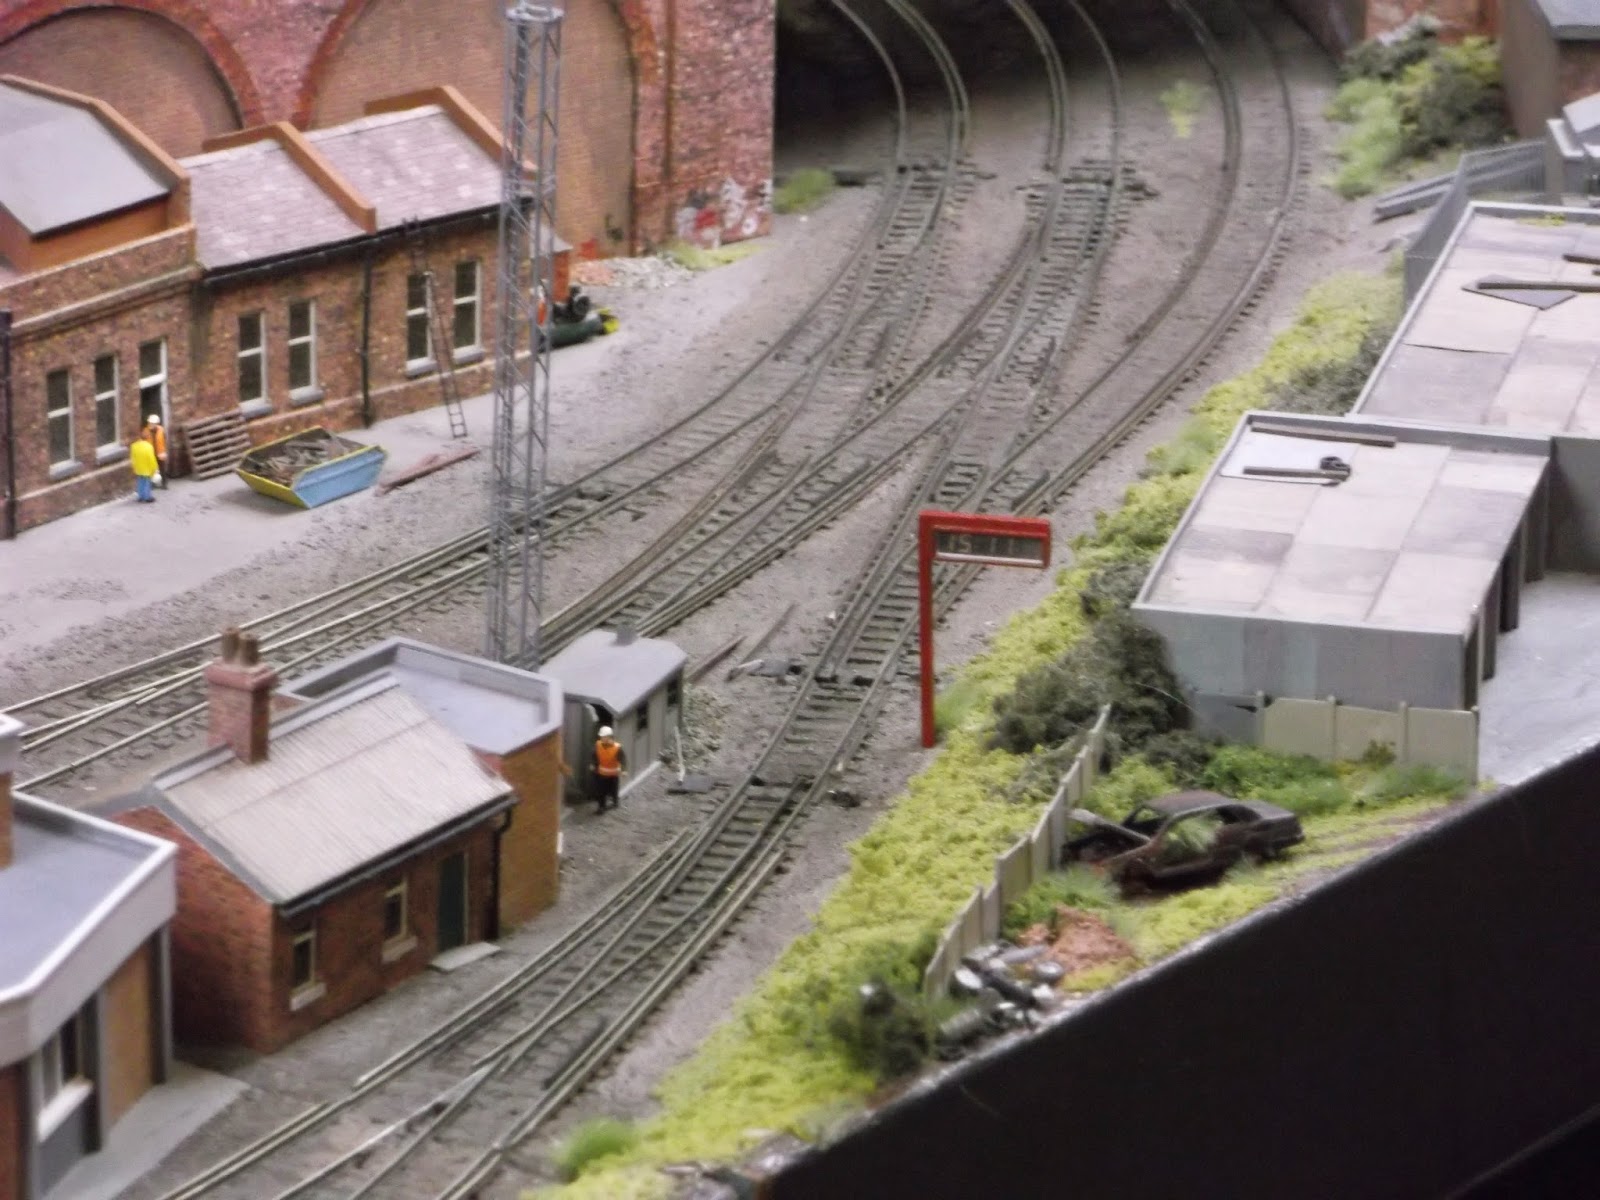
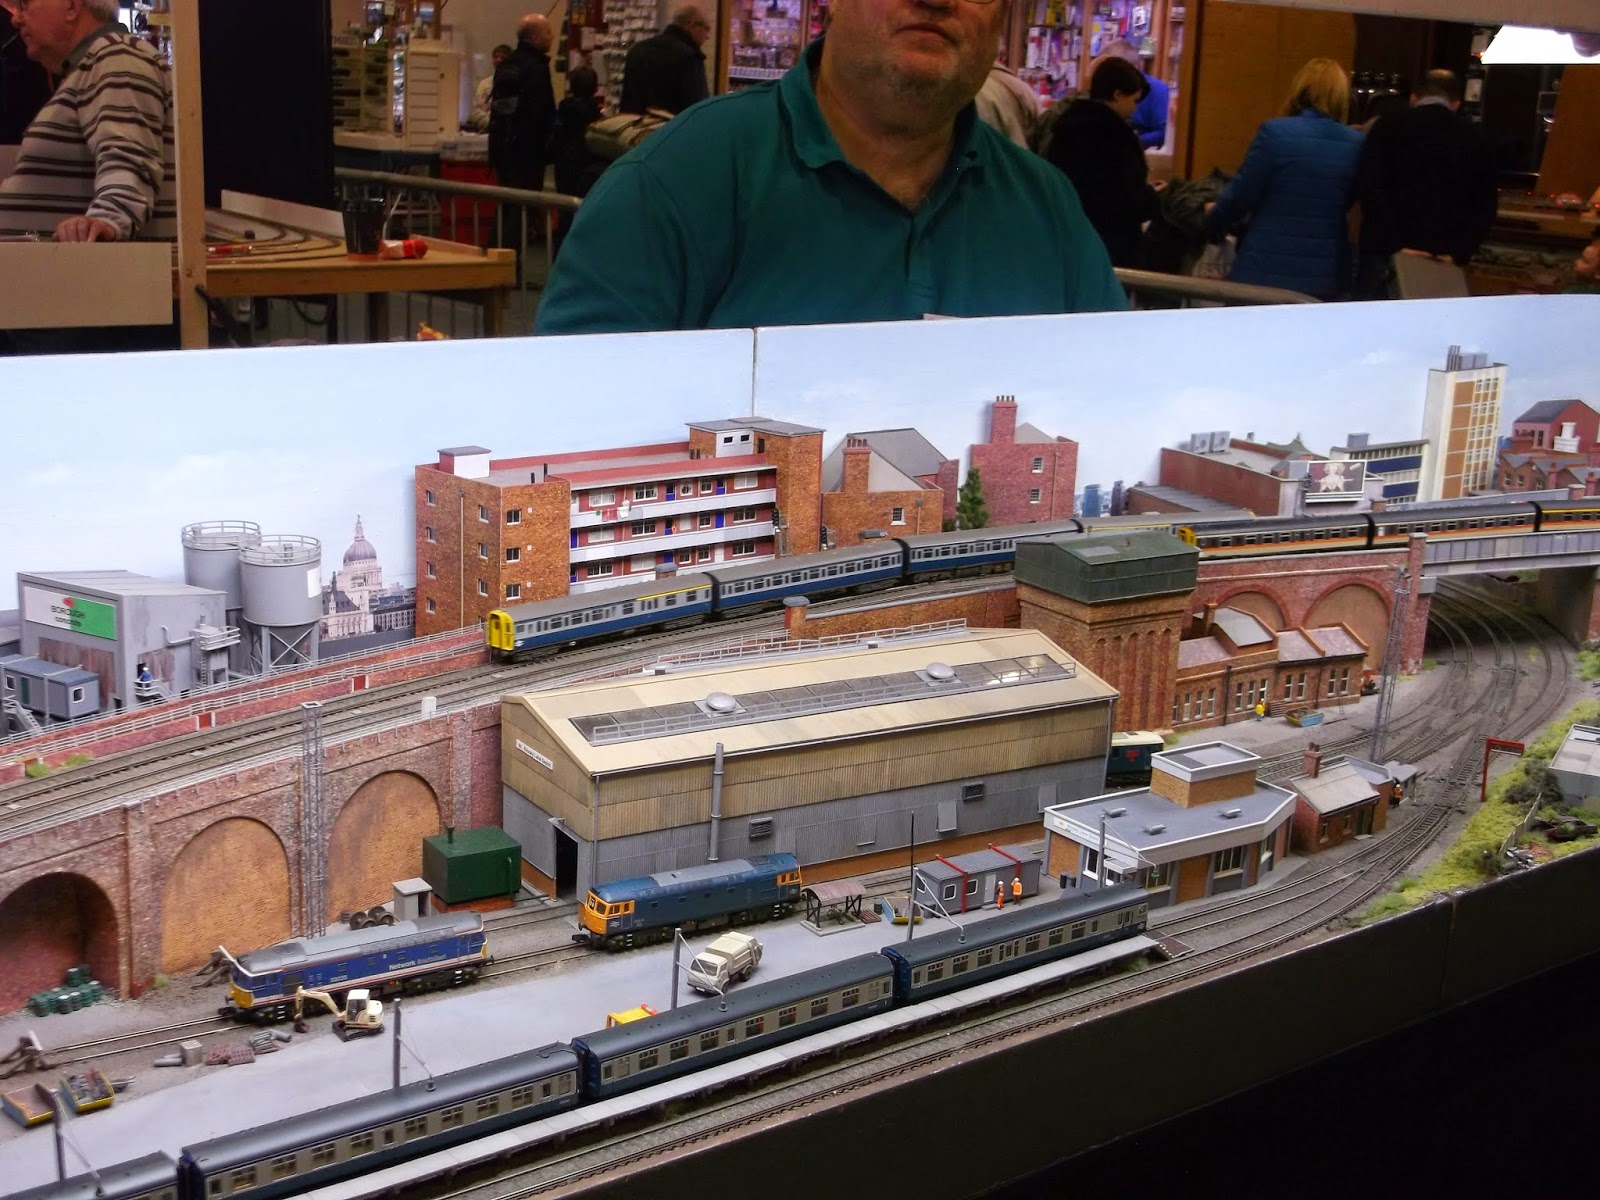
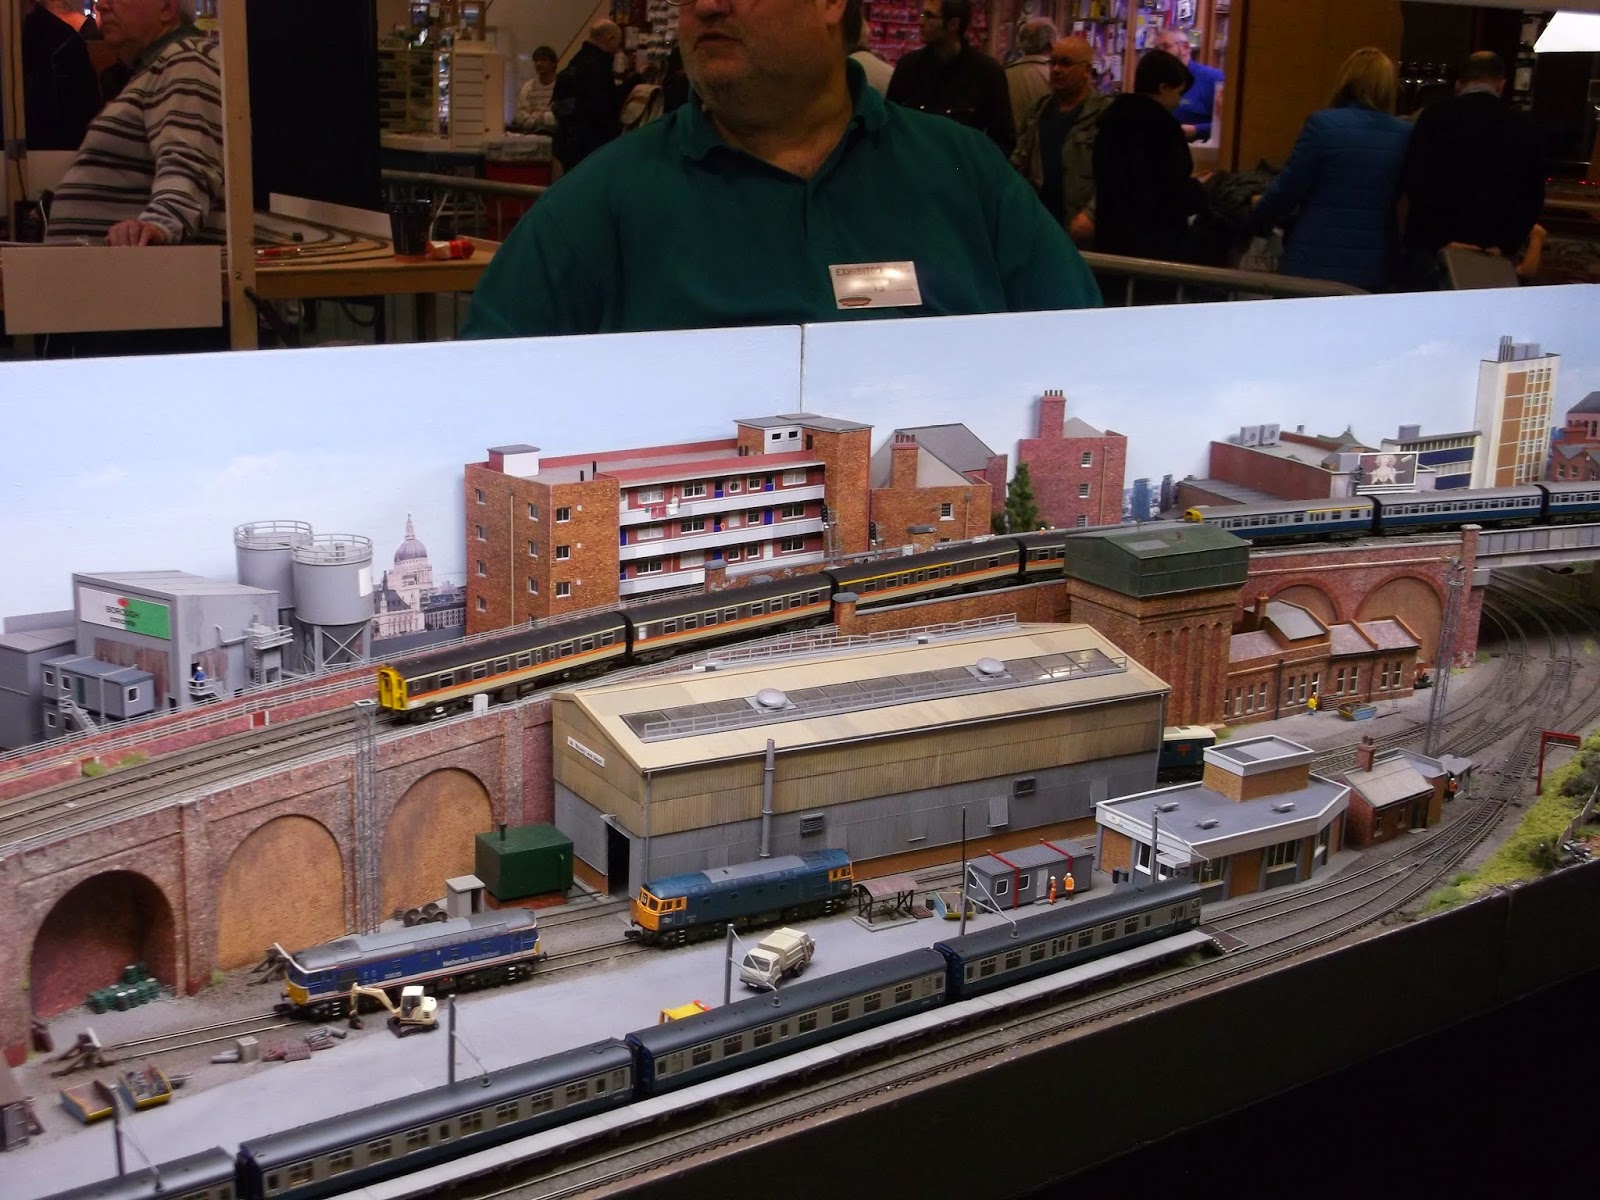
And now back to reality!  Or at least, with us at 144:1 Scale!

Did I tell you I have a soft spot for 3rd rail?

Flapper Board Clocks win an instant gold star ;)

If OO gauge 3rd rail uses Z gauge Code 60, what on earth does N gauge use?

Jaffa Cake :D

Takes me right back to my childhood, this; riding the 'Greyhound' units to the then-new Eurostar terminal at Waterloo to go to Disneyland.  The 4-CIGs, 4-VEPs and other Slam-Door units always reminded me of a rake of redundant carriages with motors jammed in and cabs stuck to the ends; recycling at it's finest.  Major kudos goes the the fine 3rd rail work, makes you wonder how much effort would go into a similarly fine catenary system, especially one that transmitted power!  The thing that nudges it into 2nd place for me is the Flapper Board Clock, and with that I've shown my cards – Nostalgia, plain and simple.

3. Penpoll Quay


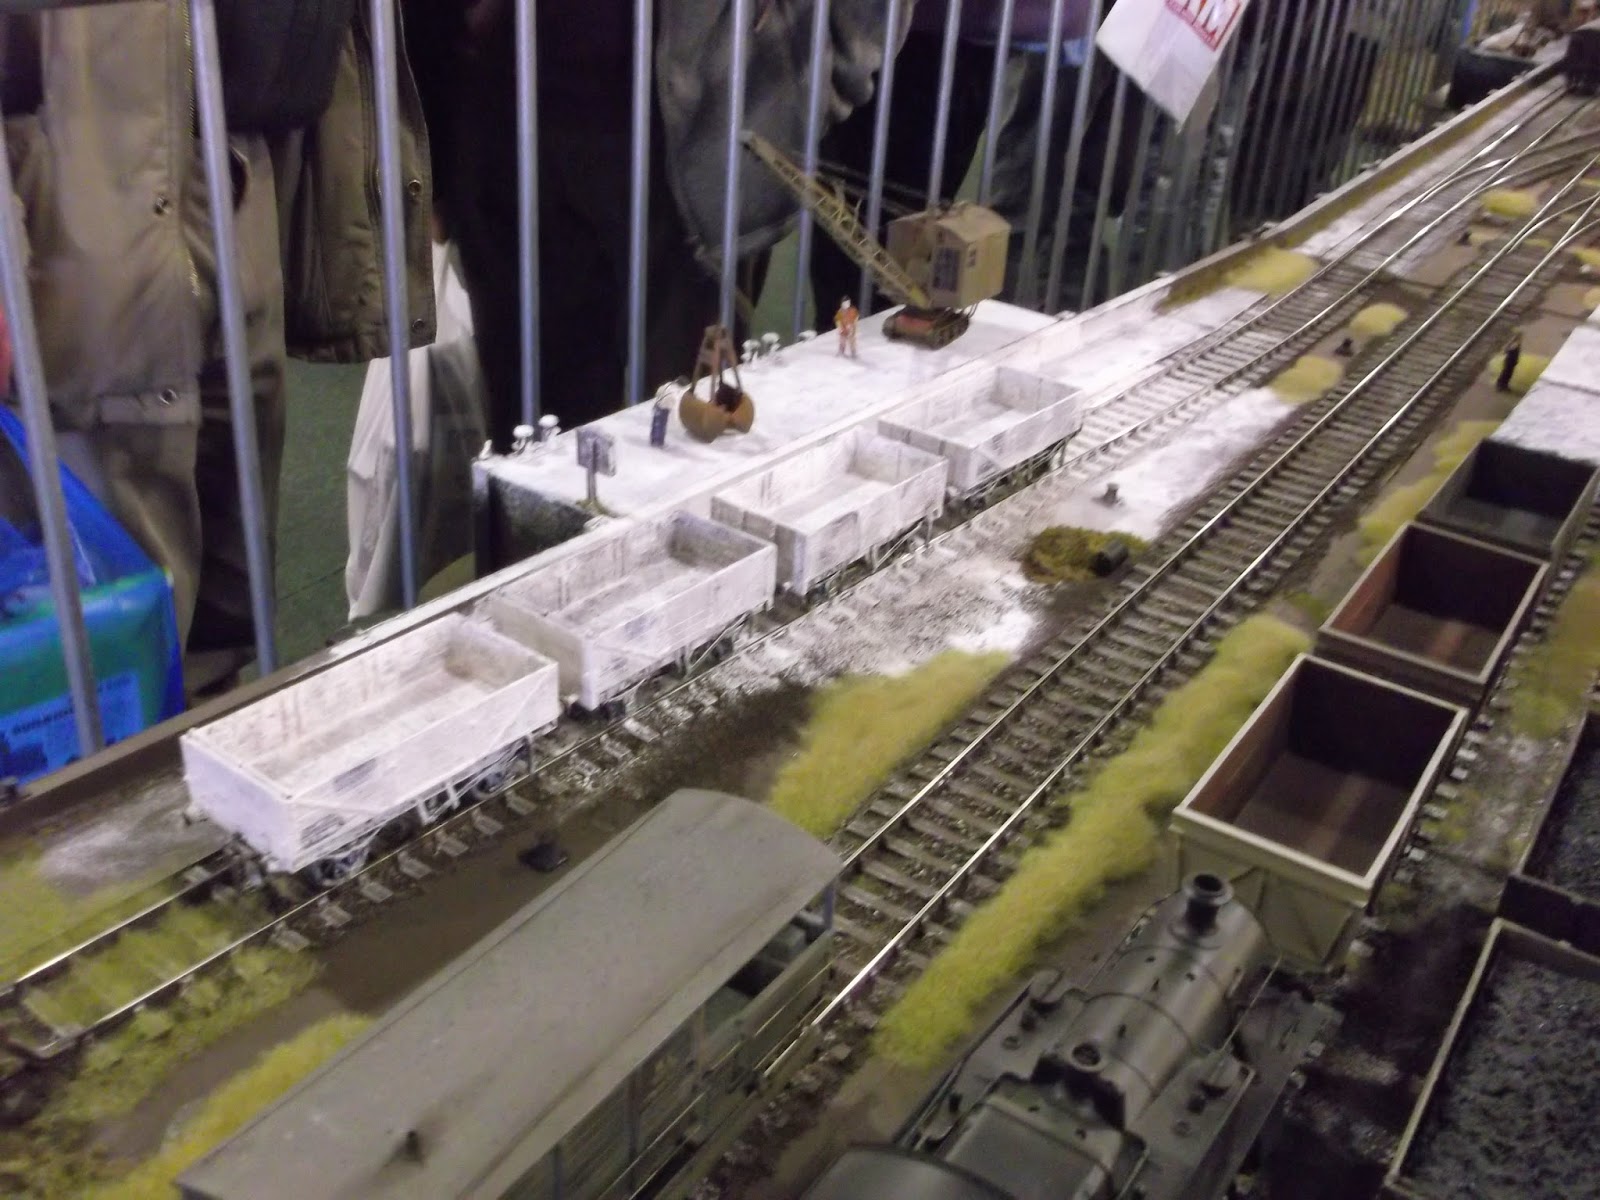
In the sea of greys, browns, blacks and greens that makes up pretty much all of the steam layout pallette, the brilliantly subdued white of China Clay is always a pleasing sight.  O gauge is gaining major traction in the hobby since RTR manufacturers began to inject the market with affordable, robust, highly detailed models.  The main attraction?  Pick up an O gauge model of any kind and you'll feel why, there's an immediate sense of weight and presence with these models that often makes up for a lower overall detail level!

Speaking of detail, the same size wires and powders for OO or even N make much finer additions to O gauge models, and with China Clay being a notoriously obnoxious commodity that lodged into crevices in anything that isn't mirror-smooth, hence the spectral appearance of any wagon that ever carried the stuff, this has never held more true.

Cornwall was certainly Pannier and Prairie territory, away from the main lines, at least.

I bet this sight at night frightened many ramblers!

If you want a layout to stand out, a specialist freight operation is a sure-fire winner, even more so if there are working mechanical functions...  Now that I think about that, what's to say you can't transport household commodities by model railway?  Perhaps we could have a Coffee train with insulated hot water tankers, followed by milk tanks, coffee hoppers and sugar cubes on a flatbed?  Just something to consider...

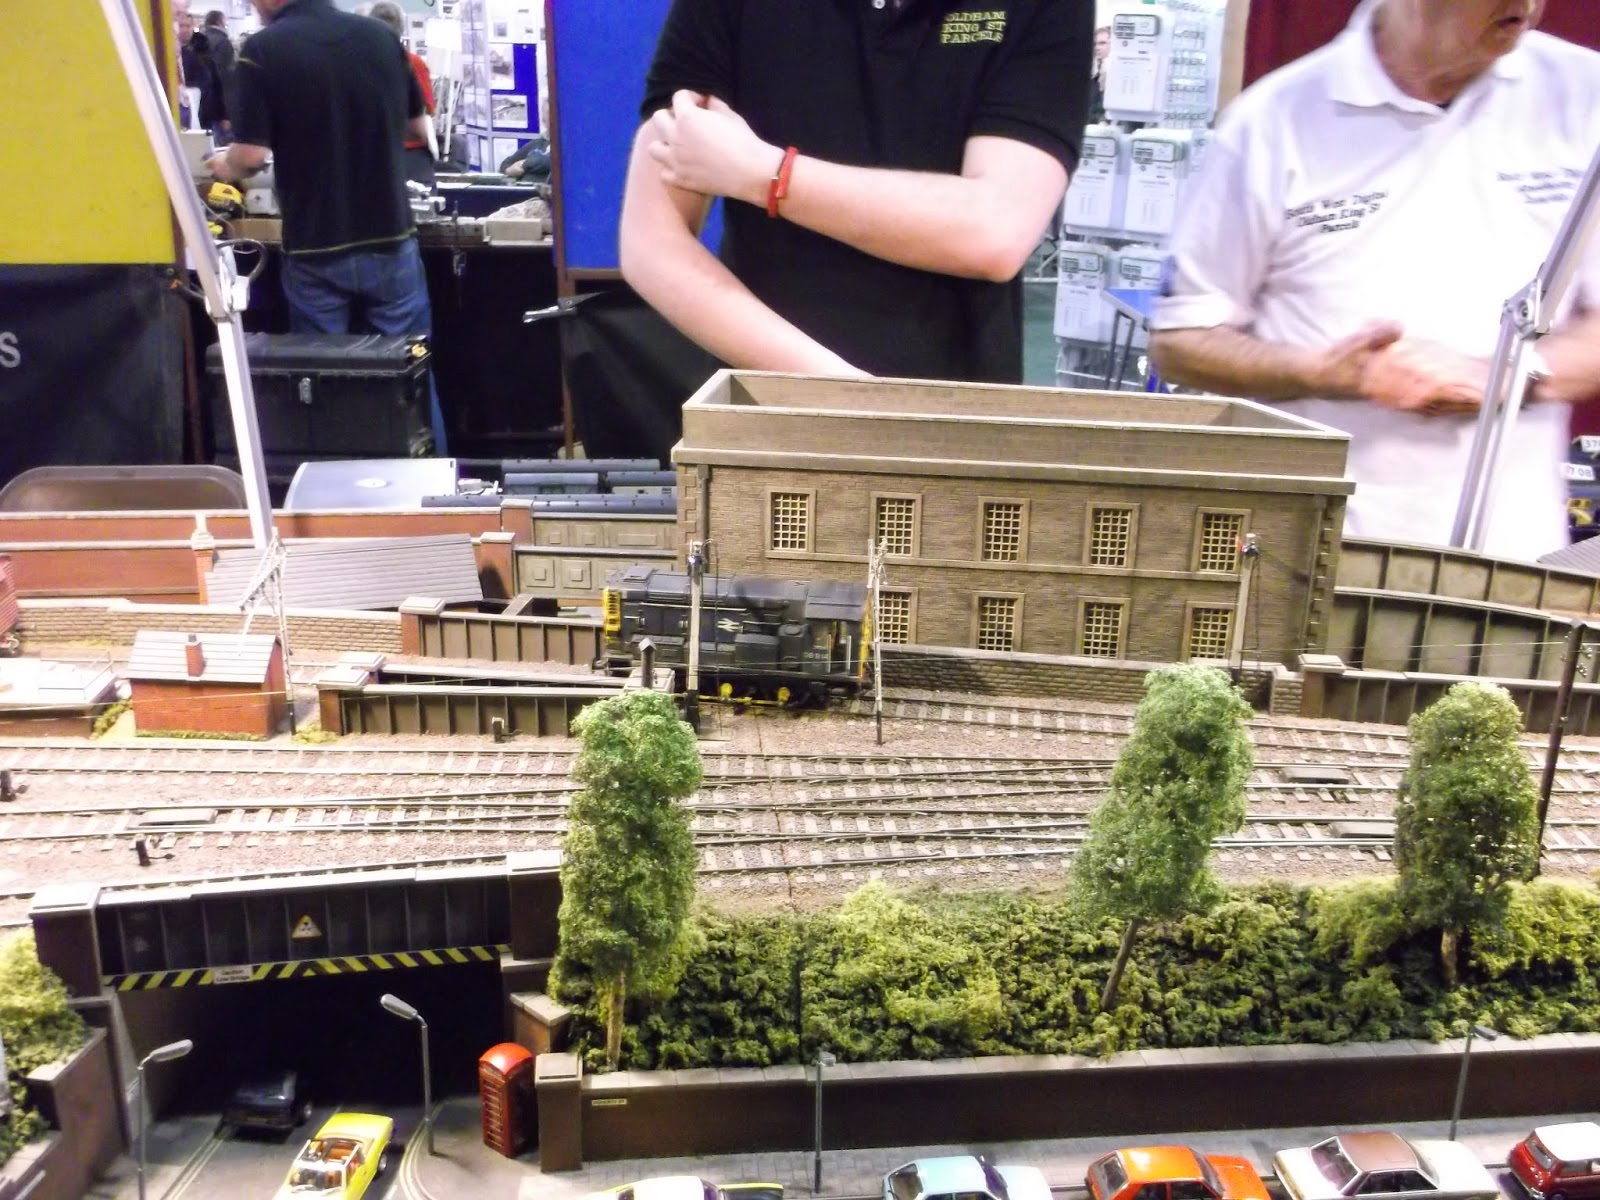
4. Oldham King Street


That class 40 looks like it has four eyes.

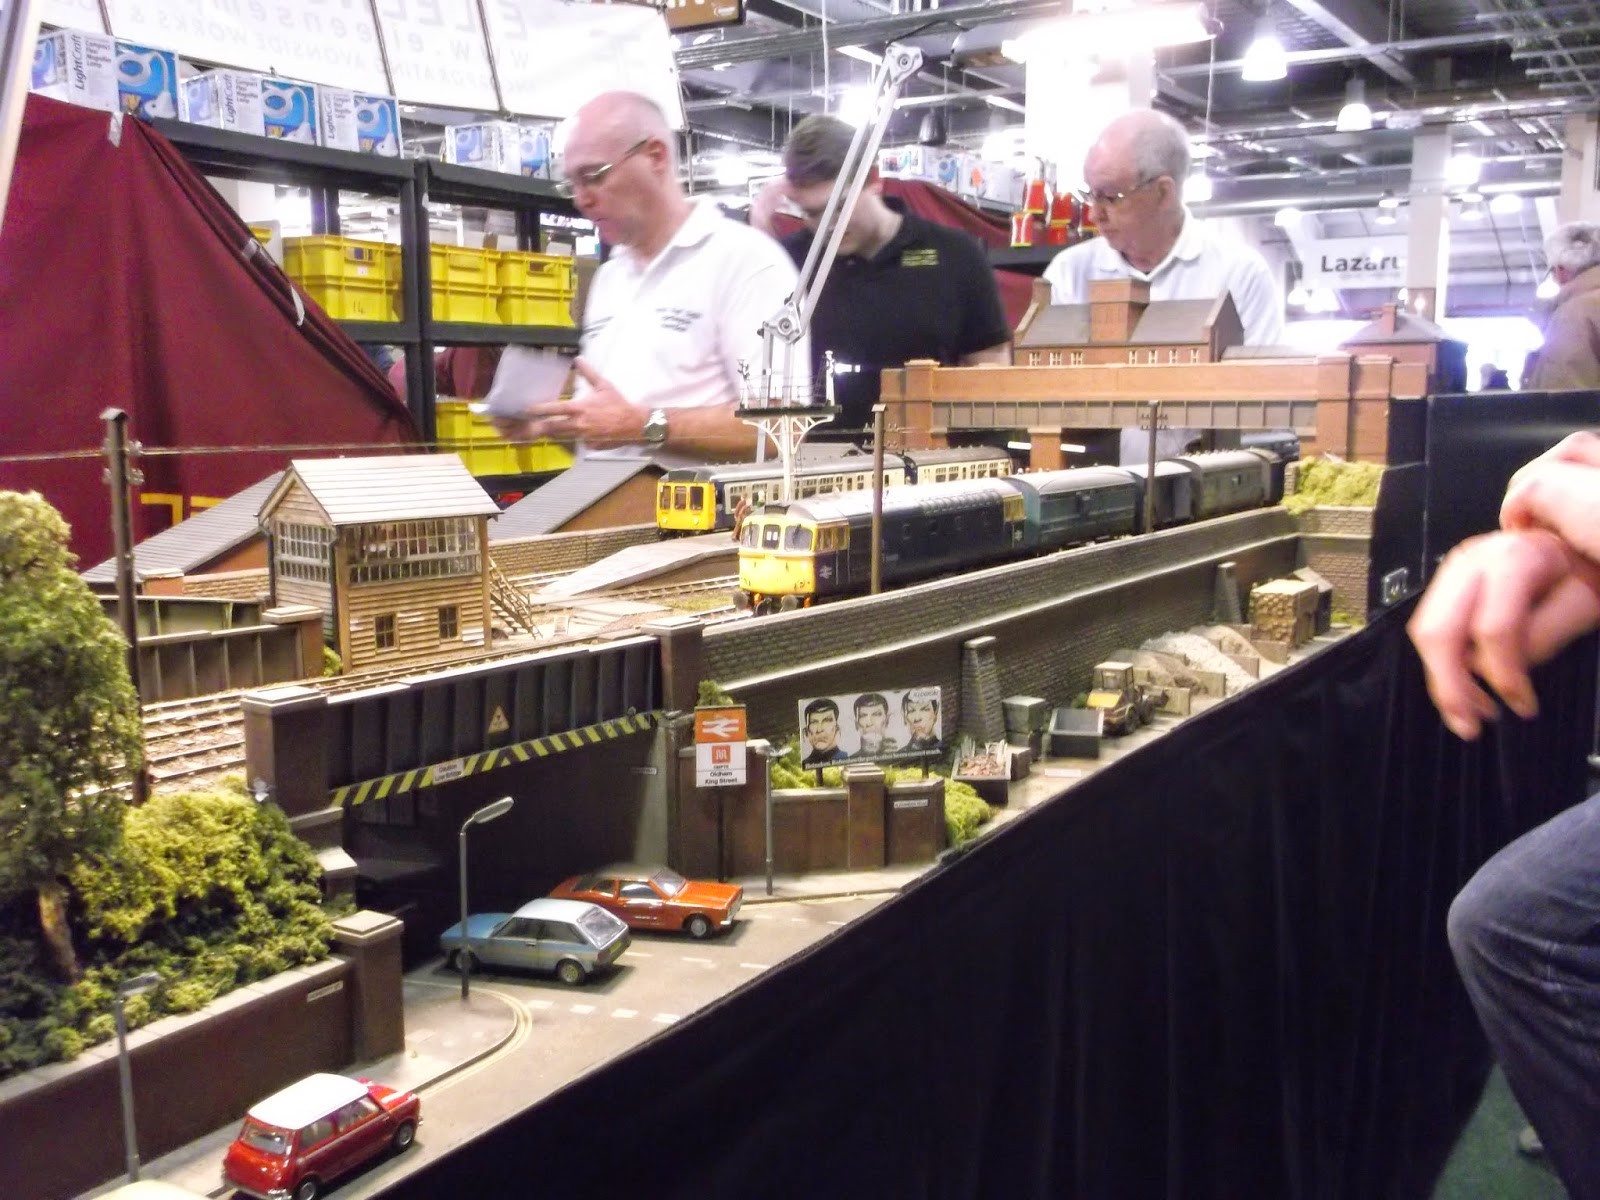
The Blue Diesel Era; a time of corporatisation, dieselisation, and bastardisation (Checkout the aesthetic debauchery on this 5-BEL. Ghastly.).  Thankfully we are spared the cold sight of blue and white on an ornate, classily-appointed train and are instead treated to some more humble machines.
Gronk does Gronky things...

A 33 passes a Derby Unit by with a few CCTs

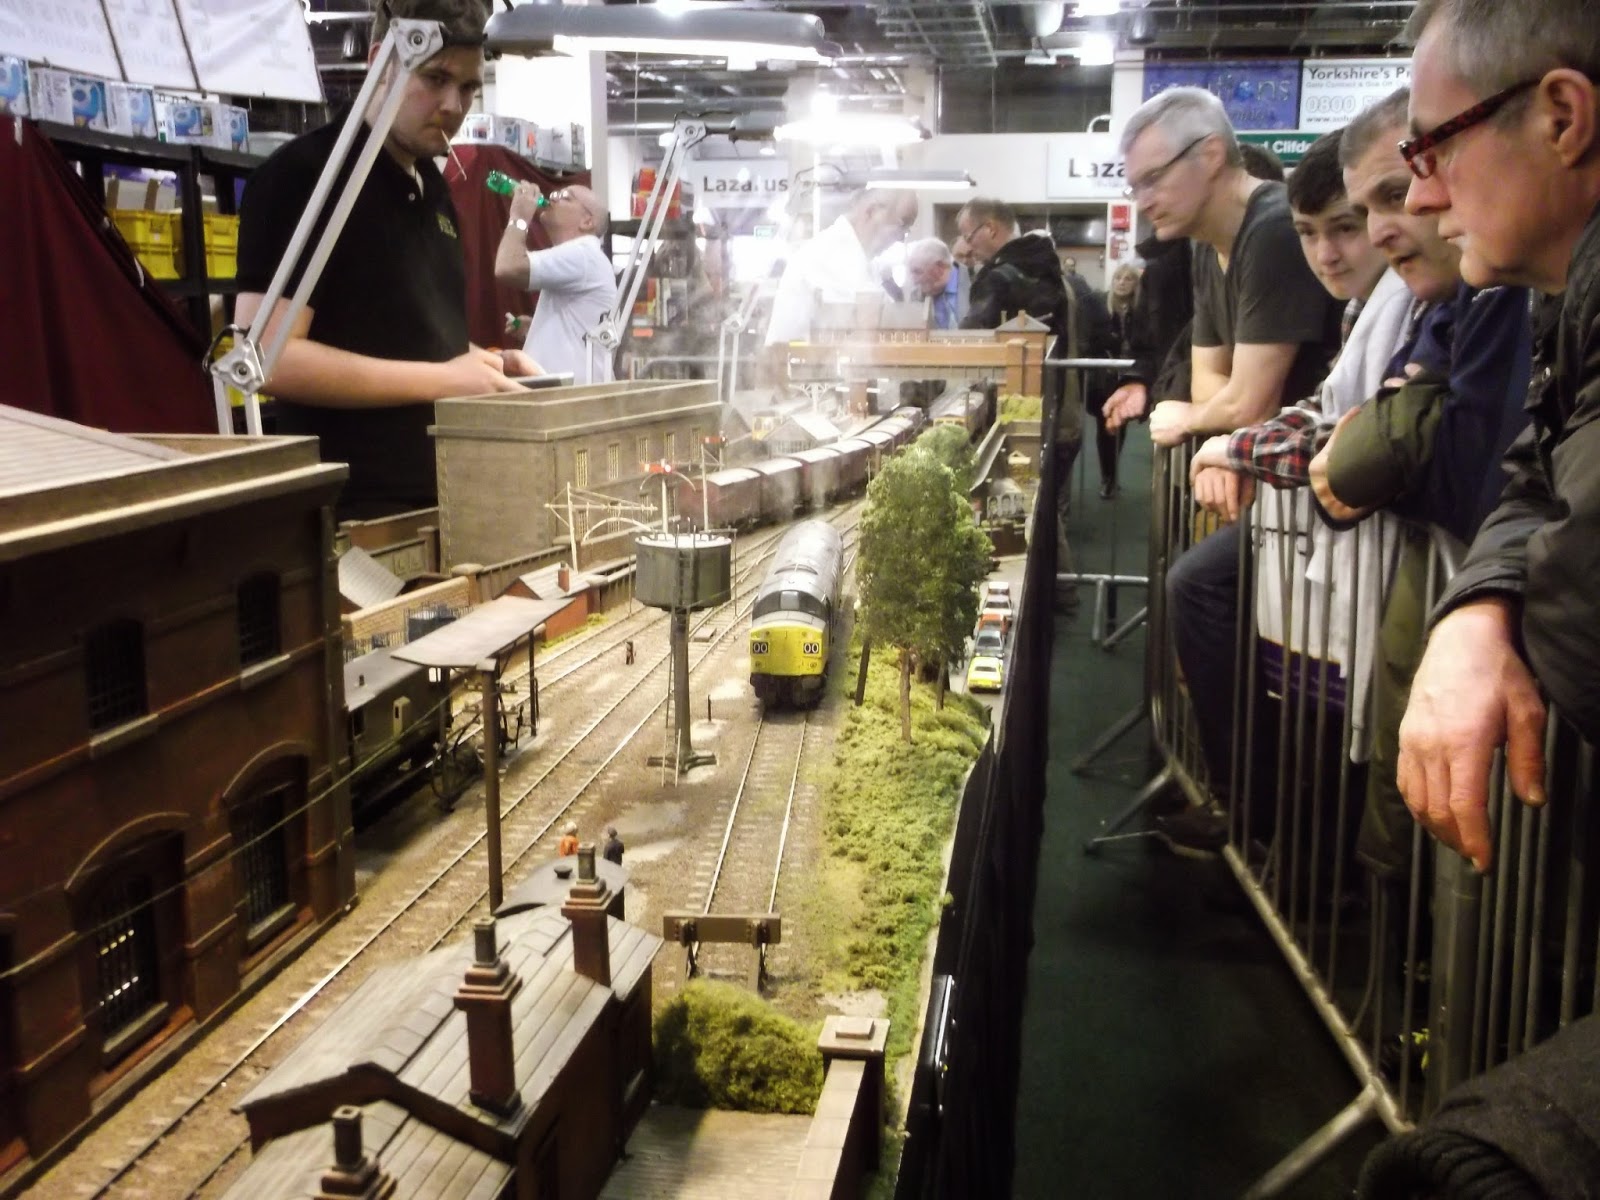
The leviathan character of the Class 40 is captured superbly with this voluminous clag and laborious acceleration.

It seems strange to see such large machines on such small layouts other than Motive Power Depots, but they can add that crucial dash of immersion by implying a greater world outside of the track on which they reside.  Not everyone can make a Leamington Spa, but that doesn't mean you can't make a nod to a larger network, just as long as there is a suitable justification for the interloper being there; we can all thank Oldham King Street for showing us that.

5. Three Mills


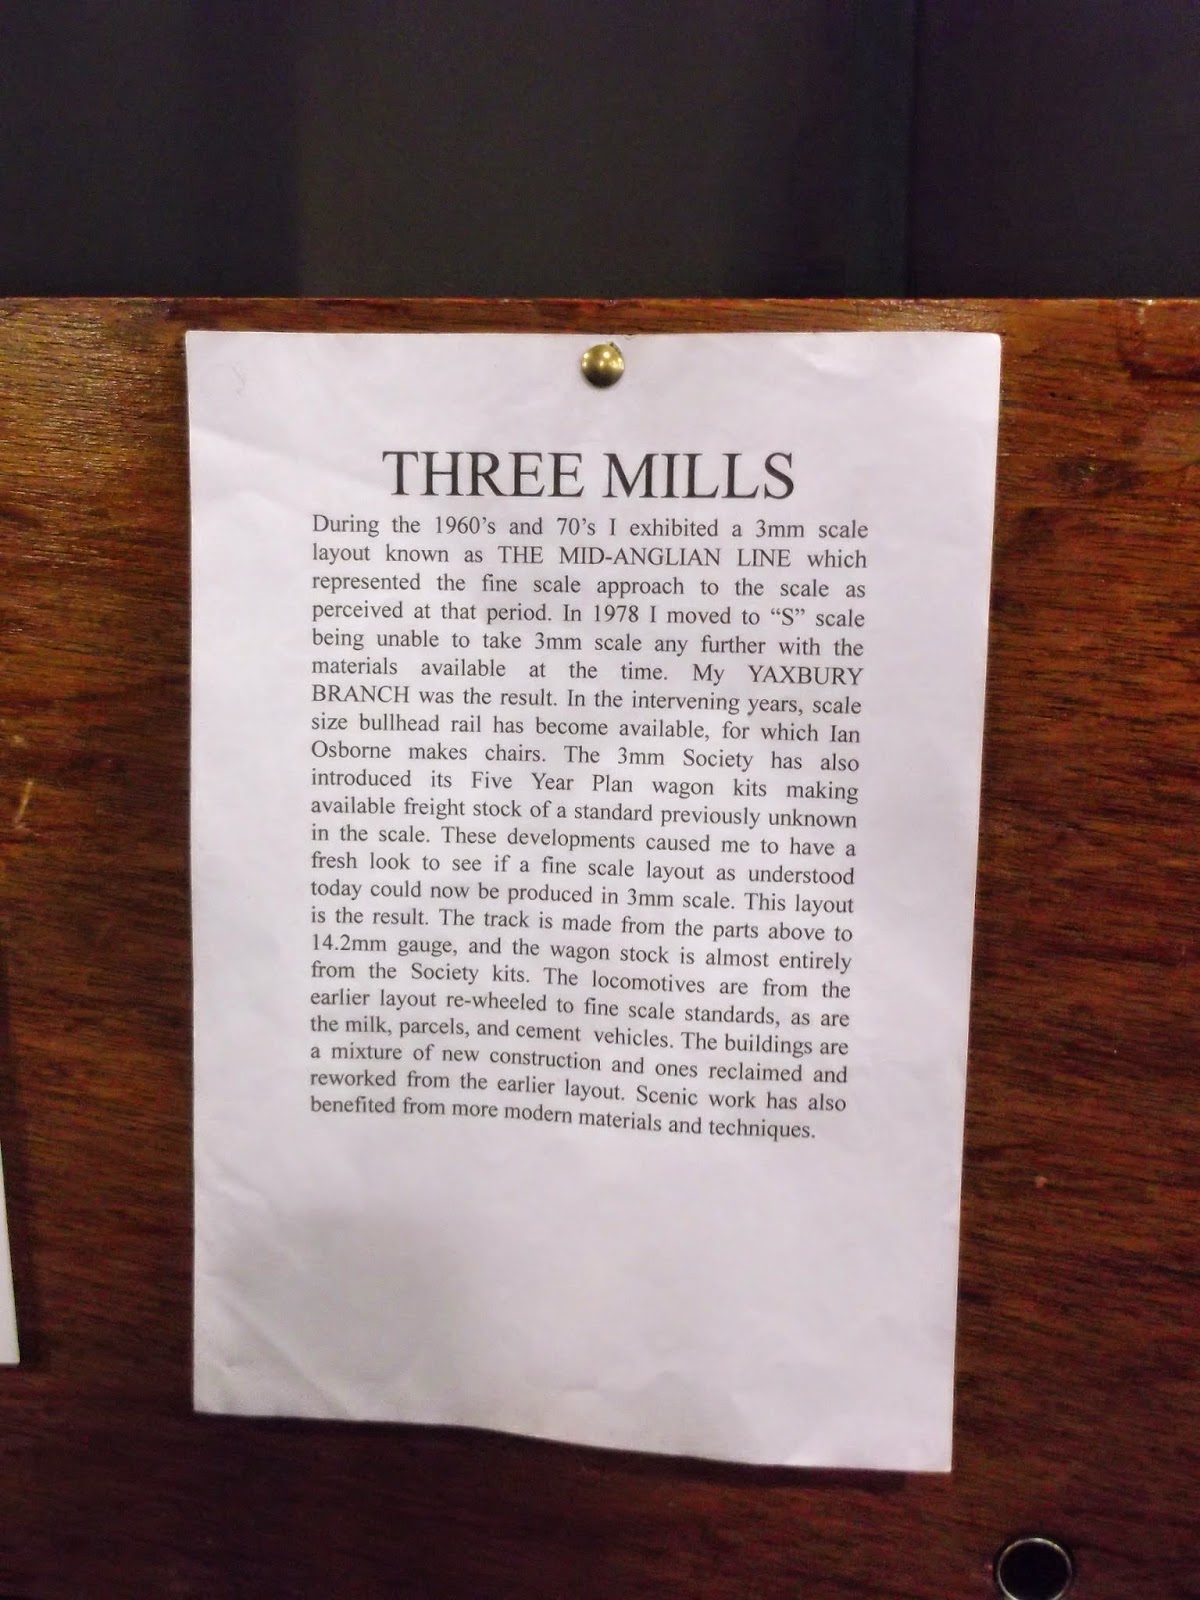
This one wins 5th place, if only for this notice:

“Cinders and Ashes!” cried Thomas, “That's morbid!”

Aside from the crude-oil humour and obvious pun, there doesn't seem to be much to this layout, but let me tell you this – I thought it was OO when I first saw it!

It even looks like OO now, trust me, you have to get close to notice it!

Classic Control Panel :D

Just in case you were still in doubt as to whether this really was Fine Scale 3mm.

If anything this layout made the top 5 due to it's scale, if it were just another OO or N layout it would be a fairly standard branch line terminus; sometimes a fresh gauge all you need.  The fine scales require a lot of work – building your own track, re-gauging rolling stock and locos, and generally pulling yourself up by your bootstraps.  In layouts such as this you can see the grease and effort put in, as the rolling stock and track takes on a hand-built, more organic form which injection moulding and CNC cannot replicate.

Closing Words


I chose this selection from the layouts I observed, that being pretty much everything on the ground floor; before I fail to mention it, I'd like to express my humblest apologies to the people behind Border's Reach, Minories, Bankfield Road and Imperial Yard.  Sunday train services meant I was short of time, and I only had, at most, 3 hours to explore and take photos of the stuff I fancied, and in an embarrassing twist of busyness, I neglected to explore the food court.  Hopefully some of you'll be at the London Festival of Railway Modelling, I'm pretty much certain to be there given that my good friend Matt Wickham of Bluebell Model Railway will be present.


I have to say that taking the trouble to travel by train on Sunday to a city I've never been in has been well worth it for me.  The Doncaster Racecourse venue proved smaller than anticipated, but still more than enough to provide a plethora of fantastic displays, as well as some innovative trade stands.  I am awfully disappointed with myself for not allowing more time, even an hour would have let me explore the food court and perhaps squeezed a video in!  Fear not, for I only live 1½ hours away from Alexandra Palace, so let these unfulfilled desires be avenged!

Wednesday, 4 February 2015

SLA 3D Printer Project Log 13: Paint with the colours of the Wickes

Oh dear...  It had to be crossed eventually...  This is a skillset I'll freely admit I have dishonourably neglected...  Painting.

For someone who is in a hobby all about making faithful recreations where razor-sharp details abound, I need some serious work on this skill, and what better place to begin than on a project that technically doesn't even require painting if the printer is kept indoors?  My original plan was to hang up the panels, spray them glorious, and have done with it; so far, it seems to be going well:

Apart from it resembling a grey-scale map of German Mottled Camouflage; economy or consistency?  The agony of choice...
I'm greatly enthused by the idea of spray-painting, if not because it's the only way my gibbon hands can get a decent coat down, it also has these goodies:
  1.  More rapid application, also dries faster
  2.  Cleaner in application, also leaves the work surface free from ghastly lumps of paint
  3. Thinner coat means paint is less liable to be chipped off
  4. Greater consistency is achievable with lower skill level
  5. Minimal equipment is required – I probably should have hung the panels up with a wire but this isn't strictly necessary

All promising stuff, but alas it is tempered by these here bugbears:
  1. Terrible with thin edges – you can either underspray the edge or overspray the sides, unless you have an adjustable airbrush or a spray can with multiple nozzles
  2. Expensive per area covered – Standard outdoor paint cans promise 10m^2 per can while you'd be lucky to get 5m^2 out of the same money spent on spray paint
  3. Solvents released to atmosphere, requires a well-ventilated area (or a shed full of panel gaps!)

Just to illustrate point 1, I have evidence of both cases, as if that's something to be proud of!

What is this “consistency” you speak of?  Do you think it'll ever catch on?
For the sake of comparison, by the way, I painted the rear panel with outdoor white satin paint (sans primer for speed reasons); am I so stoked by these results?  Short answer, no.  Long answer, very much no.

Too embarrassed to paint my Airfix models as a child, can you tell?
The worst part about such blobby edges is the fact that less is more when painting; specifically, the blobs are always the first paint to chip off.
The black lines are brush bristles, go me.
The coat does look thicker at least; don't worry, I was planning to drill the holes out from 4mm to 5mm anyway :)

Enough depressing spectacles of incompetence, here's a beautiful image of what happens when you immerse a stainless steel offcut rod (used as a paint stirrer) bathe in a tub of water and eco-turps:


Keep your skills high and your pomposity low...

Wednesday, 28 January 2015

Is Scale Inaccuracy a Cardinal Sin?

Is scale inaccuracy a cardinal sin?

3D Printing has limits, some quite strict limits, I'd like to add; Shapeways' most detailed material (Frosted Ultra Detail) has a lower detail limit of 0.1mm, yet in N gauge I've struggled to model the wheel springs underneath the Metropolitan Twin Brake Van – I had to resort to stepping the springs into the sides to give the illusion of a multi-layered object.

A fine solution to a pervasive problem...
Probably not the best example given I've added no primer, but if you squint...

It's not just simple resolution either, definition is also a problem.  The Shapeways minimum detail level of 0.1mm is actually made up of four 0.025mm laser pixels in the printer; this is to ensure the position of any details that small will be reasonably accurate, which they are.  However, this means that if you go this small (as anyone has to if they deign to model N gauge), there is a 25% directional variation in the X and Y axes (god forbid both!).  The upshot is that your “super-fine detail” will often have poor definition, giving it an almost abraded look; to make matters worse, Shapeways uses Netfabb Professional to nest the models in the most efficient way possible, which will allow the most models into any one printing operation – This means your magnum opus could be printed at all kinds of unfathomable angles!

Looks like it hit a sandpaper block in a hurricane!

Let me introduce you to what is on the left:  That is a mid-2000s model of a Class 08 from Graham Farish.  It clearly displays all the hallmarks of the early chinese production (apart from the split gears, thank god!); This one was evidently designed in Poole and thus can trace it's roots back into the 90s at least.  The major manufacturers in N, Peco and Grafar, had some pretty low standards of detail compared to what even Hornby was capable of at the time, a fact I can verify by way of a 2005 Hornby Catalogue.  N gauge at the time was only slightly better than what FUD is capable of today, as can be examined below:

Circa 2005 I believe, got it as a birthday gift :) 

To examine models, I like to ask “Could this model be blown up to full size and be switched with the original for a few days before being noticed?”

Lettering is in an examplary state for the time, but as you'll see in a minute, still a bit wibbly compared to modern efforts

A bit wide, perhaps,  though if gave it a suitably proportioned etched grille, all but the most eagle-eyed would give the nod

Grafar ought to be proud for making it's 08s look like this in N!

What can be ascertained from an inspection?  Pretty much all moulded handrails with not a wire in sight, no cab glazing, it's clear that most of the effort was focussed on the lettering and other lines (which are still a bit too watercolour for my taste).  A folorn state when compared to the OO gauge models of the time, and sadder yet when you consider how even wagons have progressed in this day and age:

Lettering is razor-sharp even when weathered

Rail-Thin details all over from 2013

Underframe Pr0n :D

Yet in spite of all this progress, the Grafar 08 still has the basic shape of an 08 right, there's very few things about it that can't be fixed by detail etches and added handrails; even advances in adhesive technology such as the glue 'n' glaze can provide a superbly simple solution to it's window-related ills.  I think our attitude towards N gauge back then speaks less about the potential for psychotic levels of detail and more about the amount of effort we'd like to put into it, not to mention the comparison point of OO gauge we had back then.  If it weren't for Grafar moving its manufacturing to China and subsequently re-invigorating their models in a big way, N gauge would have indeed become a fairly large cult gauge, full of fanatical wizards etching and bending and soldering their way to victory.

Today, we've reached the point where unless you're doing a strict time and place – and thus need to re-number rolling stock or add appropriate dirt (such as china clay operations) – chances are an off-the-shelf model can be plonked on your track as-is and look great.  The kits of today are excellently appointed too, and with advances in design and tooling, they're not hernia-inducingly hard to get right.  The main case for improving detail is in the 3D Printing sector, as well as the material properties to make a decent chassis.  Let us further peruse The Metro Twin Brake Van:

Details are a bit dulled by the black paint, makes me sad indeed :(

A clear progression from right to left, though my Metro Twin Brake seems to have sprouted fluff whilst in storage!

If anything, comparing 3D Printing to these models has made me realize something about my craft:  with 3D printing in it's current state, it is essential it looks good out of the box – the fragility of these models is easy to underestimate if you're it's daddy and you're handling it like a baby, but real modellers won't care to be so careful.  The 08 has superior definition to the Metro Brake, of that we can be sure.  The details are also cast in metal so it's far more durable, and therefore more receptive to re-working.  If you play the cards right, you could probably turn this 08 into a reasonable representation of the real thing, as long as no recent Grafar models pull up alongside, of course!

So is it right to expect surgical precision?  Could an obsession over micrometres really have spelled the end of an entire scale?  If you ask me, it all depends on context:  Ask a Shapeways modeller to re-create the modern Grafar 08 and... he's fled!  Too much in the way of technical hurdles and that's before we even attempt to recreate the etched ladders and fitted handrails.  Perhaps this is why 3D Printing is the preserve of the most obscure wagons - wagons that only exist in highly-researched books on quirky and largely forgotten avenues of railway history.  An admirable intention, to effectively catalogue all of our railway's forgotten history in model form, but if you want a hand at this yourself, I recommend sticking to OO where you can fall back on WSF (Polyamide to other companies) and still have a reasonable amount of detail; N gauge 3D Printed rolling stock has yet to come of age, but I'm confident it will in the next 5 years.

Consider the Madder Valley Railway (Vid here), it's models grind and groan as they traverse the layout, and the style seems to make no sense with Beyer Peacock locomotives hauling distinctly American coaches; but it is a true survivor among layouts, it's visual appeal has failed to be quenched even as it's flock materials fade in colour and the wheels look comically disproportionate by modern standards.  This is how we ought to treat the hobby, not as an egotistical scoreboard, but to approach it with the aim to create an atmosphere; to immerse the viewer in a frozen sliver of time, or even just to amuse them with quirky cameos or even mechanical functions!

As for the debacle over “The end of N”, it was right to condemn Grafar for a lack of progress; you start a company to pool resources, to purchase industrial tools and manpower to surpass what an individual modeller can be expected to achieve.  The old Grafar 08 strikes me as a model that could have, potentially, been cast by an enterprising modeller in whitemetal.  My point is that we should not let detail take hold of us like money does to some people, because it produces the exact same sad result – a loss of humanity accompanied by a loss of compassion (we all know the rivet counters, do we not?  Who likes their company?  Silence...)


To follow your heart, is it worth losing your mind?

Saturday, 24 January 2015

SLA 3D Printer Project Log 12: Dropping the Hammer on lack of construction

You know that feeling when you've finally been liberated to make real progress on something?  In a sea of drudgery and busy-bodying in the real world, this is a shot of Dopamine straight to the brain.  This is even more so when you've been procrastinating something for so long that spiders the size of your big toe have set up ambush positions in your cooking utensils (as happened to me when I cleared out my shed; yes, my spine is Petri Jelly, no need to remind me...  *sigh*).

Nails, the classic solution for design ineptitude - that or excessive amounts of glue and filler!

The rush of finally taking action is, as we all know, the best time to find out we've been imbeciles – as I found out when I discovered my top vent had no tabs for locating the parts together!  I had basically expected the builder to be able to glue these together against gravity no matter which way up the join was being made.  Rest assured this will be fixed in the final 1.0 release, but for now, we can get busy with a Pin Vice (Check out the review here!).

If you think this is laborious, try correcting a hammer drill gone haywire...

As I examined the Z carriage to which the Build Bed is mounted to, I couldn't help but notice that there was a slight warp, a horrifying scenario for a part absolutely dependent on being straight and true!  At risk of making the Z carriage too heavy for the Stepper Motors, I knocked together a barn-door solution on a whim...  Unprofessionalism?  What is this, the Intel FABs?

Spare Extrusions fixed in place with Stud-Locked Nuts and Bolts; a nice solution, though I'd be lying if I said I wasn't concerned for strain on the Z motors.

Among the bits that I bought in a project-buying frenzy were some black, chunky tapes with a faint magnetic field.  These are for mounting the UV-Reactive Acrylic Window Panels.  TBH I'm a little worried about their powers of retention given that most ferrous things are barely attracted to them, but at least my Hard Disks are safe :)

Pro-Tip for those doing this:  Dampen the plywood surface where the ends of the tape meet, apply cyano, then affix.  Safeguard against peeling ;)

One final note is how we can expect the panels to be mounted; I've found some Slim T-Nuts for the extrusions that don't need to be slid in before the panel is aligned, so I can mount the panels after the frame is built – you can't imagine how much rage this will save!  On the downside, I've missed out on the chance to become the next Francis...

This thing locks against the extrusion when tightened, so no worries about it spinning in situ.

Locking in action, shouldn't too hard to remove them again.

Stay Productive...

Monday, 19 January 2015

Tawe's Testing: The Maplin Pin Vice Set Review

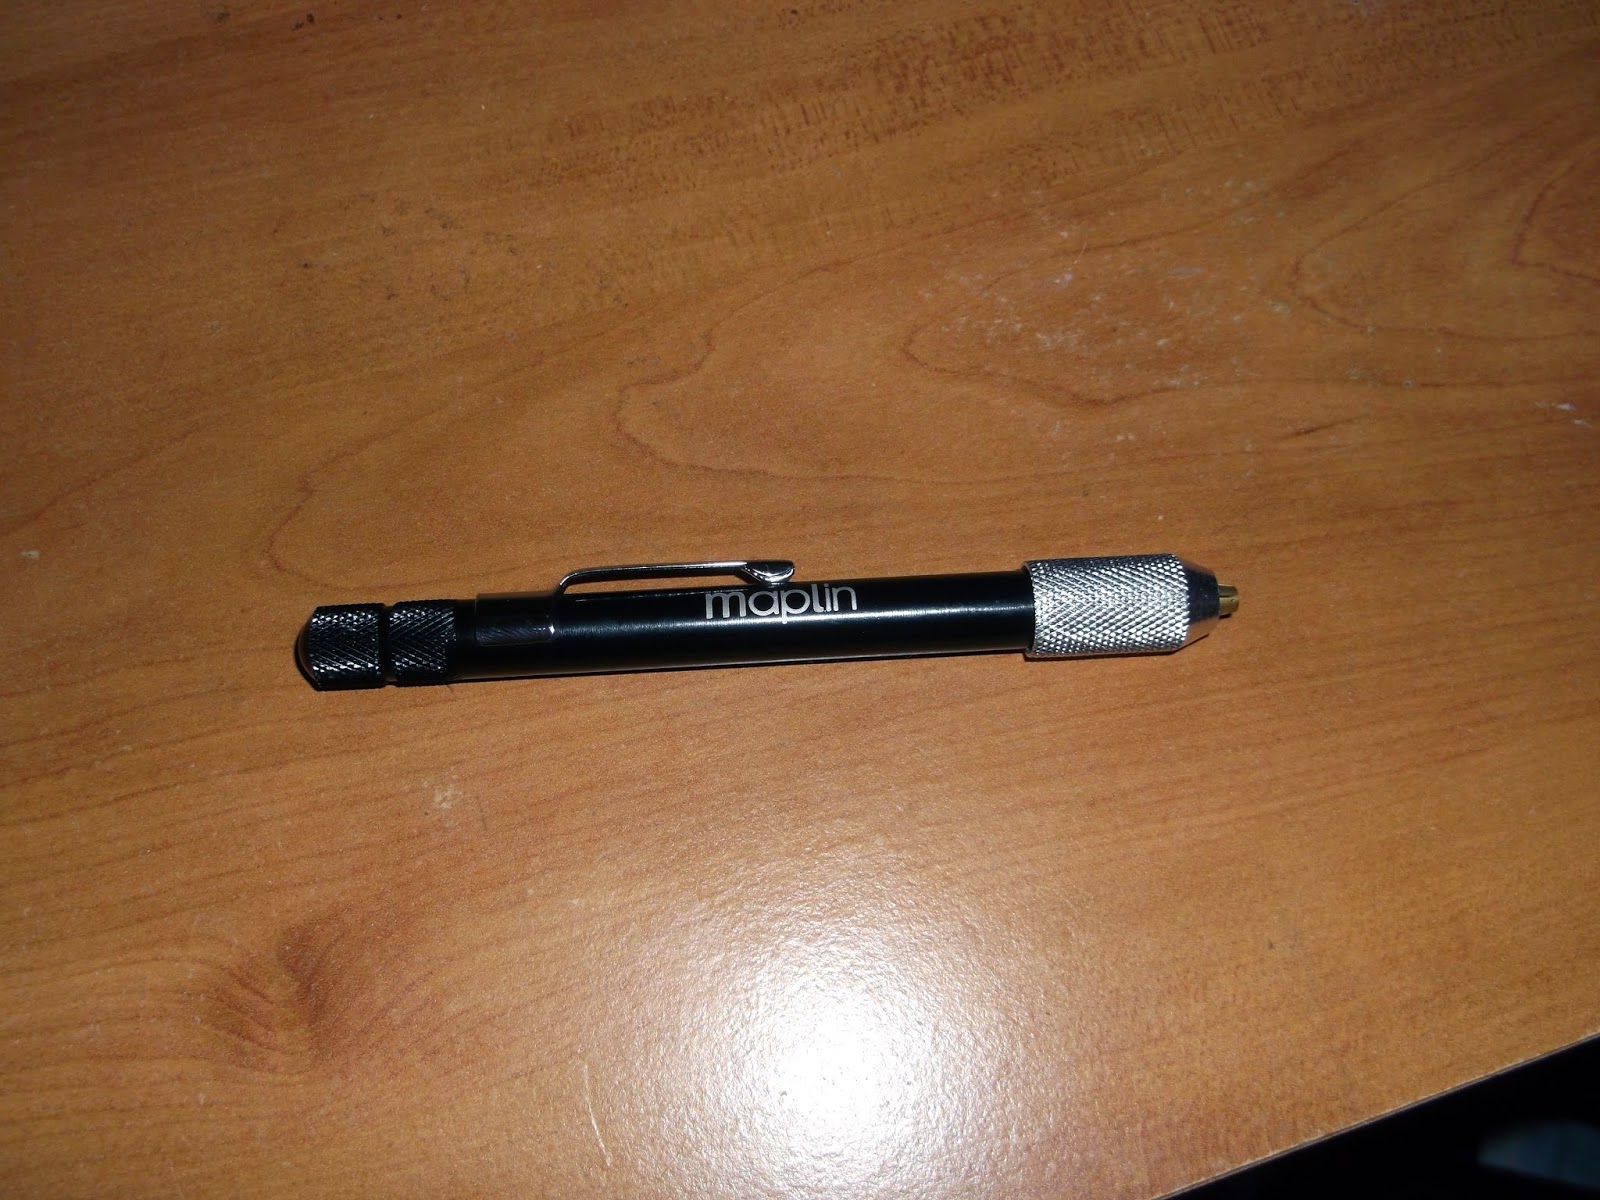
Here it is, Review the 1st, and it's a fairly ubiquitous tool for those who work with resin and etched body kits – the Pin Vice.  Maplin furnishes the reviewer with this device, being of all-metal construction and coming with a kit of microscopic drill bits, it seems we have been spoiled at first glance.

Even the Maplin lettering looks neat, no budget aesthetic here!

Upon inspection the unit shows great promise – The aforementioned all-metal construction lending a feel of dependability that is essential in any respectable tool, the knurled handles adding to the industrial ergonomics.  There is even a pen clip on upper side of the body to shove it into a pocket pouch, although doing this with a 0.45mm handrail-sized bit installed seems like asking for a punctured lung!  The collar is also suitably knurled and seems to have a snug hold on the chuck, though becomes quite irrelevant, as shall be explained in good time.

Odd though it is, the asymmetric nature of the chuck did nothing to prevent good use :)

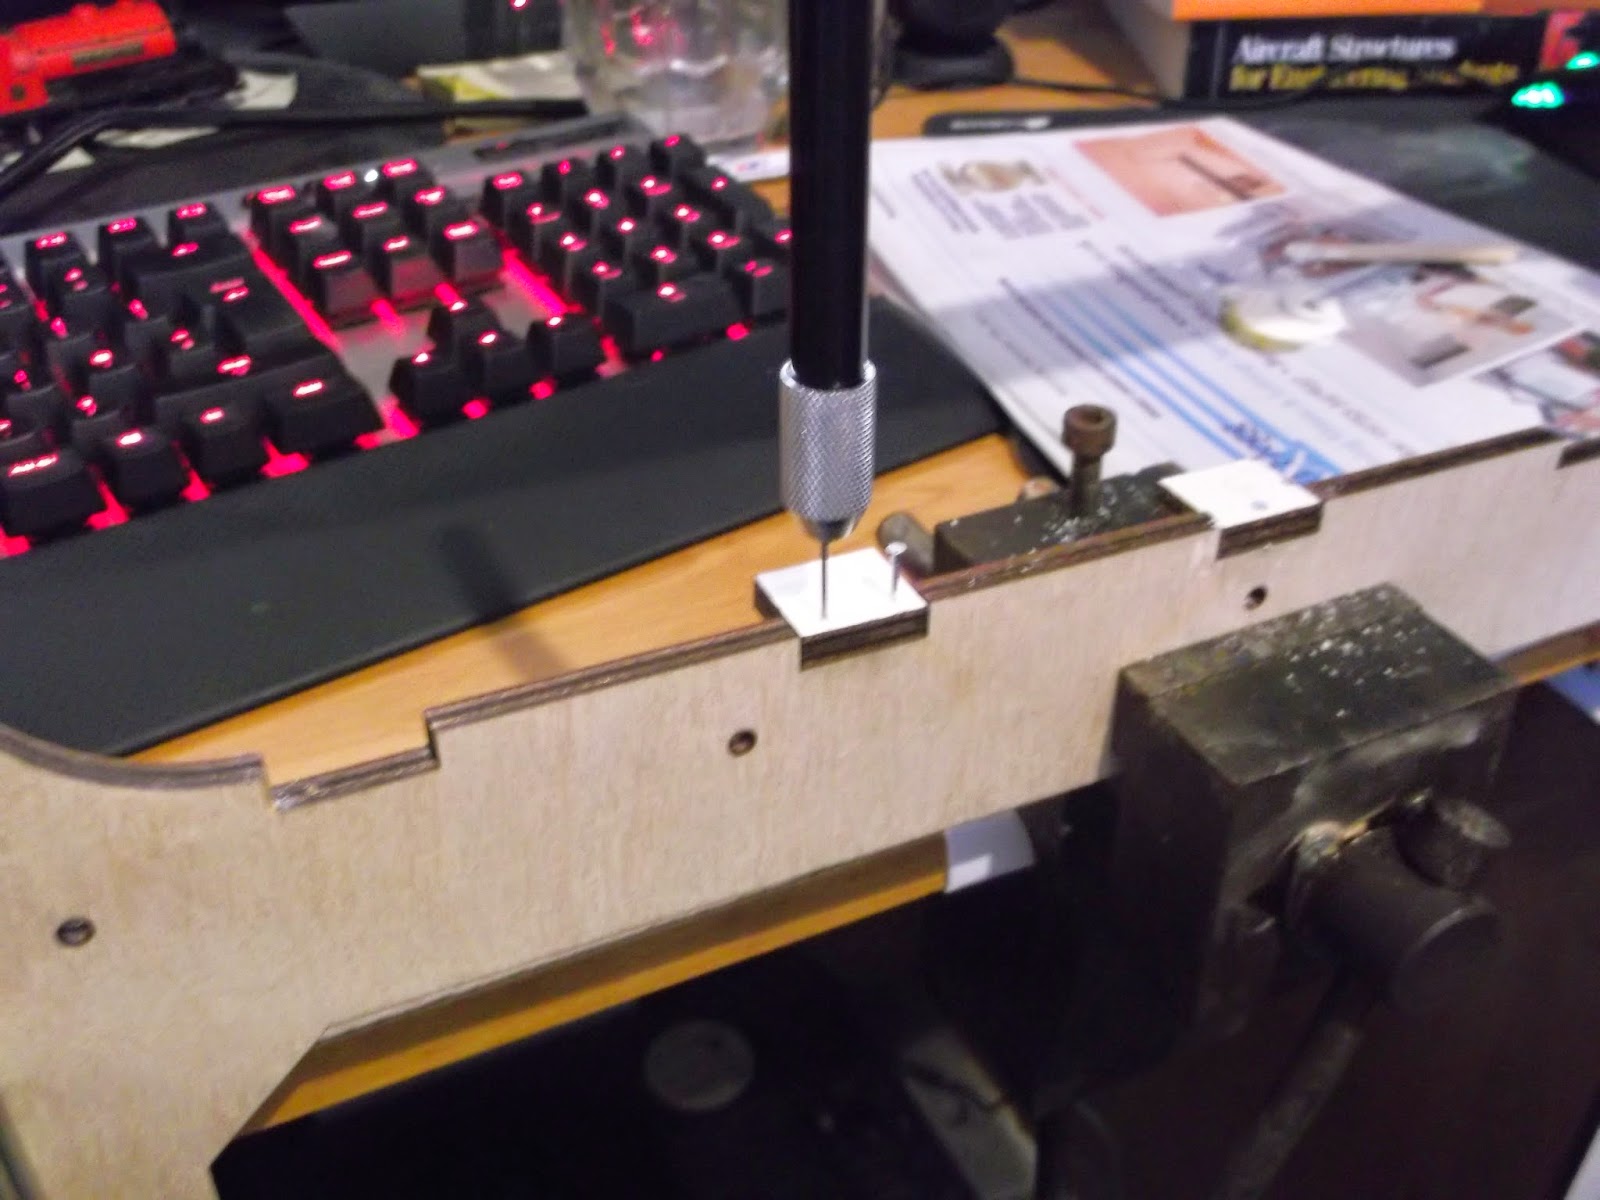
There's a lot to like initially about this set, only costing a nice round £9.99 (leaving a penny for the copper box!); giving you a 20-piece bit set to pick from, ranging from the human-sized 1.5mm bits to bits so absurdly thin you could bend them with your breath.  Once I'd got a 1.2mm bit in, and gotten stuck into some plywood, the vice was very stable and made light work of drilling pilot holes 20mm down, making drilling parallel to the plys a much calmer experience than you'd expect, with no fear of splitting the wood.  It is here, though, that a rotating top would be highly appreciated, especially when you need to put some real pressure down.

The Pin Vice on test, looking quite at home burrowing into some 6mm plywood forming the top panel of my SLA 3D Printer.  Yeah, that chunk of aluminium and keys is my keyboard, I take my PC equipment very seriously indeed...

And this is only where the issues start.  Chief among the problems is probably the one thing that makes this set both cheap and versatile – the chuck; I do like the idea of not having to exchange chucks whilst reaming out different holes, if only for the sake of sheer expediency, however, if removing the bit becomes like playing tug-of-war with a German Shepard in an exosuit, that's where I draw a line the size of a country border.  Upon removing the chuck, you'll find a hexagonal end not unlike those found on interchangeable screwdrivers; sadly, hopes of being able to use a more comfortable handle are quickly dashed upon finding the end flopping hopelessly in the socket (you might argue that this arrangement has no collar, and you'd be right, but with a chuck as clenching as this, I don't think that's a major loss).

Not quite a decent fit, don't know why I expected this brassy metal to be magnetic, but there you go.

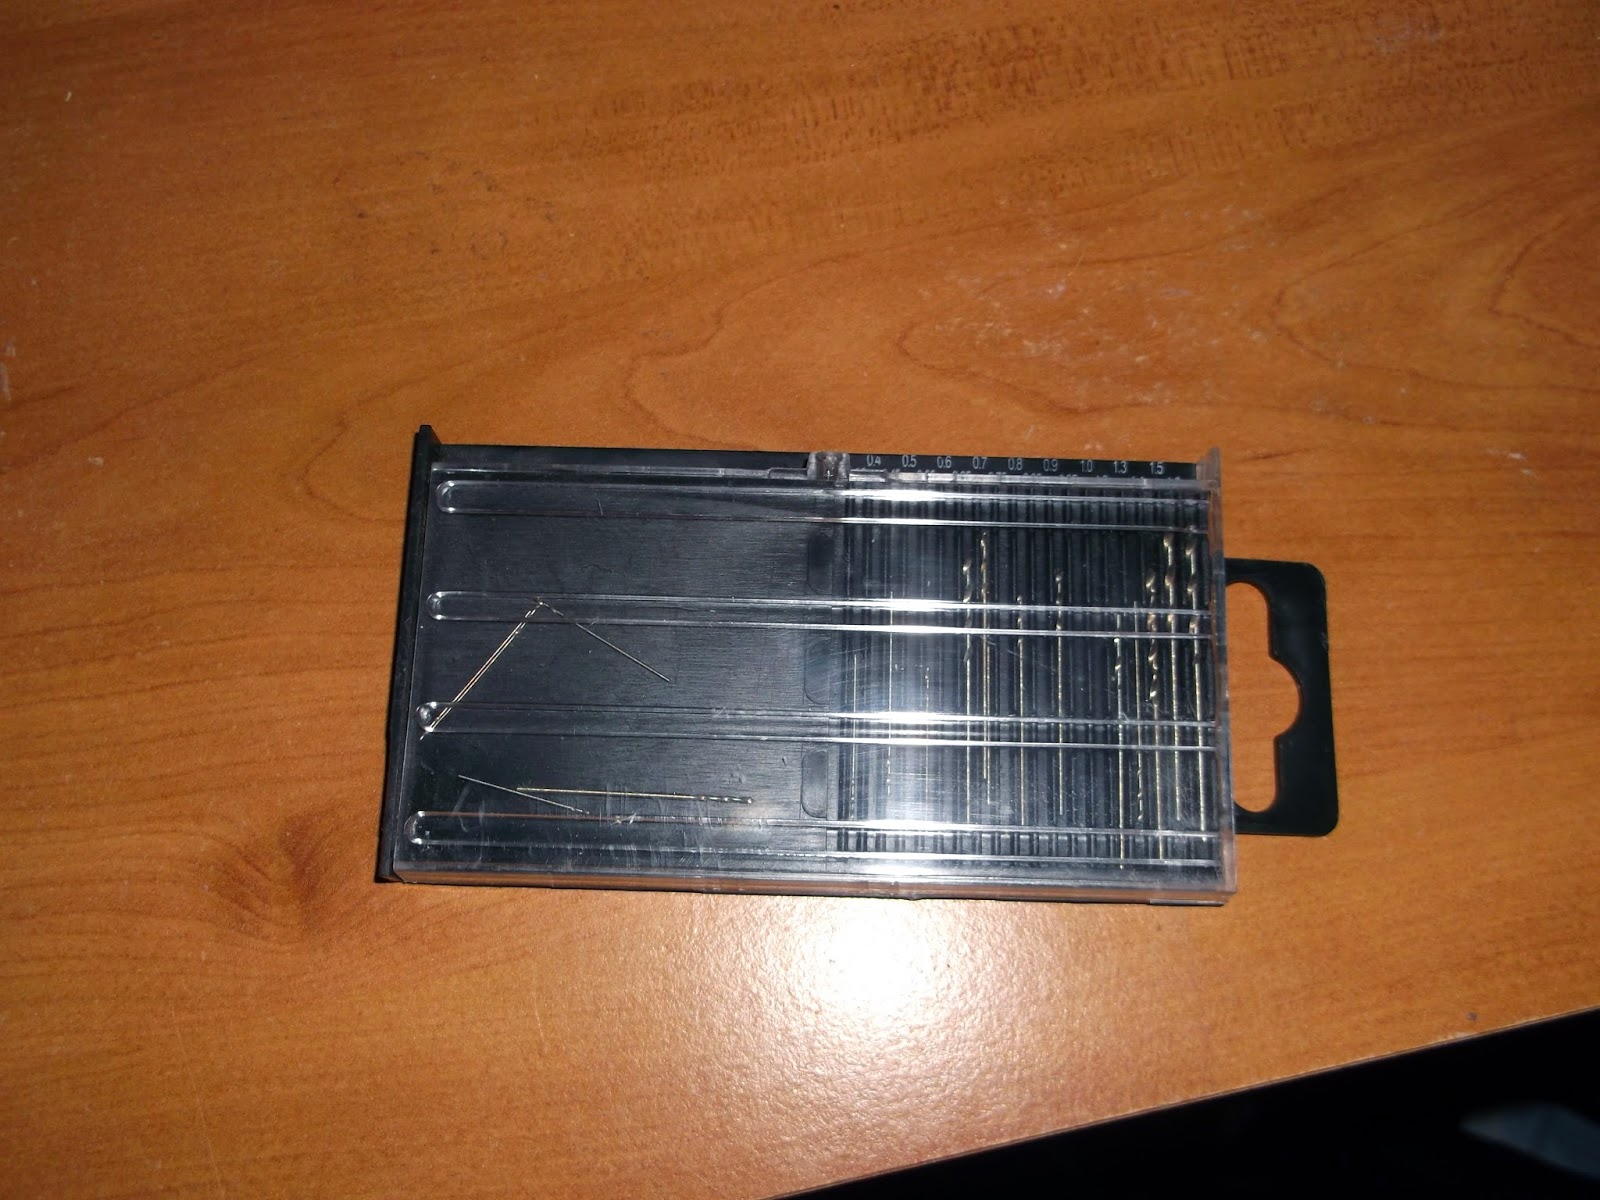
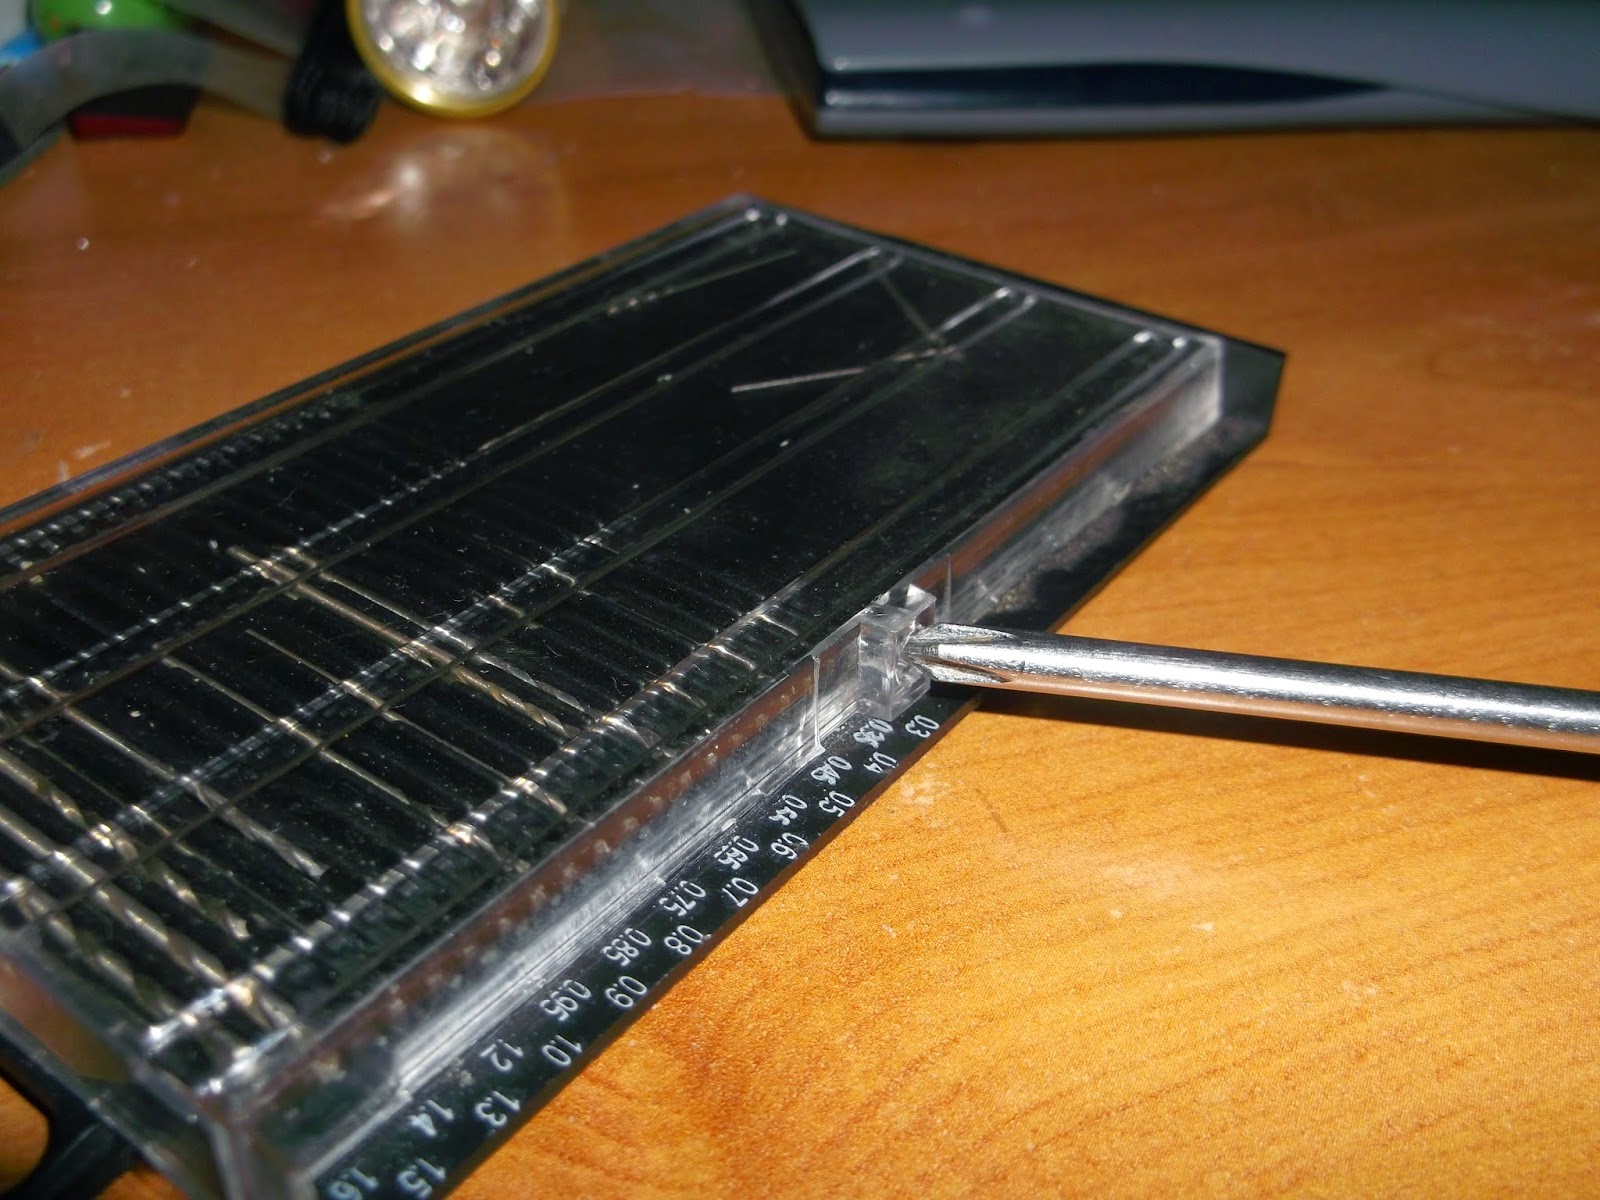
Then there's the Bit Box.  The bits themselves are decent, I've seen worse tools, but the box they came in seems like it was designed to aid in sapping POW morale; it's bad enough that there's no clips holding the bits into place, but whoever made the lid cling to the tray like a kitten to your jumper ought not to become a politician, as this design error will surely be his opponent's dream trump card!  As if the lid was not okay with just being clingy, it's not immediately apparent how it opens, and the best I've come up with is to use a Philips screwdriver to (valium in hand) prise it open.  Not a good job here, especially after the promise shown by the Pin Vice itself.

Quite a selection, even if they look like they don't damn well behave themselves!
The most precise and careful way I found of getting into the box, depends on how steady your hands are.
Since this is my first review, I ought to detail how my review scores work.  First off is Detail, pretty much the objective of out hobby, so it makes 30% of the score.  Quality is a close second, also taking 30%, since we all want a model that'll last, right?  Function takes 25%, maybe a little small, but if this is poor at least it can be made into a static prop.  Finally Value is at 15%, value is always welcome, but I reckon most would shell out for quality in other regards, wouldn't you?  The overall score is calculated with these in proportion, with each point being 5%, so Detail is 6 as is Quality, Function is 5 and Value is 3; the overall score is consequently out of 20.

So my summation of all this goes thus:

Detail 3/6
Probably a little strange that a tool gets a detail score, even so, in my mind it represents how much attention was paid to little additions that increase comfort, functionality, ease of use, etc.  This is a fairly average example since the pen clip is nice as are the knurled handles, but it could have done with more.

Quality 3/6
Another average score, the Pin Vice itself being worthy of a 4/6, and the Bit Box taking 2/6, this makes a mean of 3/6.  Pity.

Function 4/5
The Pin Vice works very well, as do the included bits, only that lid on the Bit Box lets it all down with it's steadfast refusal to part without showering you with swarf-laden fletchettes!

Value 2/3
While £9.99 seems expensive in this day and age, there's no getting away from the actual value proposition here; some may argue that you can get better at Poundland and eBay, but with both you take a chance – Poundland tools are usually only good when they are simple things like sanding blocks and hammers, while eBay deprives the customer of a direct, tactile assessment of the product.

Overall 12/20

Only slightly above average, not going to be used in Hornby's R&D Benches anytime soon like similar offerings from proper hobby suppliers, so it's probably best bought in the same manner I did – for want of a quick tool for pilot holes.

In other words, I'd recommend something proper such as this Expo Drills & Tools Pin Vice - £5 at a model show, several chucks made out of proper tool steel, and a more versatile handle to boot.