Saturday 29 March 2014

SLA 3D Printer Project Log 3: Salt and Spot-GP

So I finally got around to conducting an experiment in how much salt is needed per unit volume of water to buoy the 3D resin.  Overall results were:  Flotation, Frustration and Fiery throat...  well not quite, but 3D resin does get it's vapours in there and make it sore.

I filled a measuring jug with 500ml of water and an unspecified quantity of Spot-GP (around 75ml I believe, which in a 14cm x 9cm basin is around 6mm of resin), As before the resin sank to the bottom of the jug:
That's not another menacing fluid in that beer glass, that's Robinson's Orange & Mango.
I then proceeded to add salt in 10g increments, observing the water as it took on a misty opacity and more blobs of Spot-GP found their way up:
Sadly at this point, the blobs would still choose gravity as their mistress...
When I got to 60g of salt, I chose to adopt the more efficient method of weighing the salt bottle, dumping salt in, weighing it again and finding the difference; at 75g the resin was buoyed but over time it took on a form that would doubtless terrify any sea creatures below:
I suspect Archimedes will come in useful when ascertaining salt content for the actual tank.
Once 120g was reached this behaviour ceased, but the resin was still too heavy for my liking, so I added 30g to make 150g and that was my final amount - 1 Litre of water to 300g of salt:
Still have no idea why that step was there...
That isn't a final number - I couldn't test the planned 20mm of resin due to the constraints of the jug and Archimedes states that the force uplifting the less dense fluid is equal to the mass of the denser fluid displaced, thus it becomes easy to calculate the salinity required for a 20mm layer of resin in a 14cm x 9cm basin (with some cheeky help from here):

  • 140mm x 90mm x 20mm = 252,000mm3
  • Water is at 50C to account for exothermic heat from resin curing and summertime conditions.
  • The density of Spot-GP is around 1050kg/m3.
  • Hence the mass of the fluid is 0.2646kg.
  • For the same volume of Saline Water to buoy this resin effectively we need a density of 1200kg/m3.
  • At 50C worst case scenario therefore we need 270g of salt per litre.
  • I plan to allow for up to 150mm of Z travel in my design, so basin depth will likely be 200mm with 180mm of Saline Water, giving a volume of 2,268,000mm3 which requires 612g of salt.
While this amount may be alarming, it shouldn't hit the wallet too hard since salt costs around 30p for 750g, which is staggering considering 500g of Sylgard 184 costs £50 and to fill the whole tank with Spot-GP will cost a humbling £230 just to fill the tank.

Other observations of note:


  • Cured resin tends to float in the absence of a build plate, which should be good for build quality but presents a challenge for finding a suitable build plate material.
  • The resin stuck well to a stainless steel teaspoon I had on hand (I used a cigarette lighter blue LED to do the curing, 3 cheers for professional equipment), and the part did not loosen even when stirred vigourously through the fluid.
  • Some bubbles of water were present in the resin even after salt was added, so a through mixing may be useful before printing, perhaps with an electric whisk.
  • Some of the salt came to rest at the bottom of the fluid even after stirring, so take that into account when mixing the Saline Solution.
  • Natural UV light pollution from the room cured some of the resin around the edges of the jug (image below), so a "Dark-Box" will be necessary and the printer cannot be open-frame.
Quite a day today, especially since I did some science for once!  To cap it off, here are two ancillary images from the experiment:
A clear ring of resin is to be seen, there's another one at the bottom if you look closely.
Two of the test "Prints" done via blue LED.

Wednesday 12 March 2014

Spot GP and Salt... literally, that's the premise of this post...

I am pleased to announce that I have achieved success in getting Spot GP resin to float on saltwater; I have no idea how much it took, my first attempts with a "reasonable" amount of salt made my heart sink:
This is what I get for being reasonable.
However, a further heap of salt produced this:
Spot on, Spot GP :)
In related news, I've recently come across the Noble 3D Printer project, which gives a build area of 270mm X 200mm X 400mm (x,y,z), or way above Reprap Specifications; using a 1080p projector gives a minimum resolution of 0.185mm in the Y axis, half of the Reprap's 0.35mm minimum recommended nozzle size.  Kinda makes me want to up sticks, but then I saw the requirement for a welding kit - I aim to make my printer constructable without any welding, I didn't mention that before.  I plan to use plywood sections as the framework and outer shell.

At any rate, it proves the idea of using a saline solution to float the resin - and save hundreds - is entirely workable, I need to buy my own supply of salt (my parents like chips as much as I do) and a measuring jug to conduct a proper experiment to attain an actual ratio, so that'll be the next topic.

Friday 7 March 2014

SLA 3D Printer Project Log 2: Nemesis = Norovirus

You know what needs to die in pain?  Norovirus.

I attended Brighton Modelworld 2014 on Saturday the 22nd of February (such was the state of my affairs afterwards, took me long enough), all went fine until the return train ride (Brighton - Clapham Junction - Farnborough Main) that I suddenly felt a great heave in my belly...  and up came some grapes...

Two hefty, debilitating vomits later, you have the longest and tensest train rides you can ever experience.

So yep, I have no idea why this Demon-spawn (of which as few as 5 can infect) isn't on the CDC's hit-list, but that's why I've taken so long to get back on track; and what better to kick it off than a projector that has seen better days:
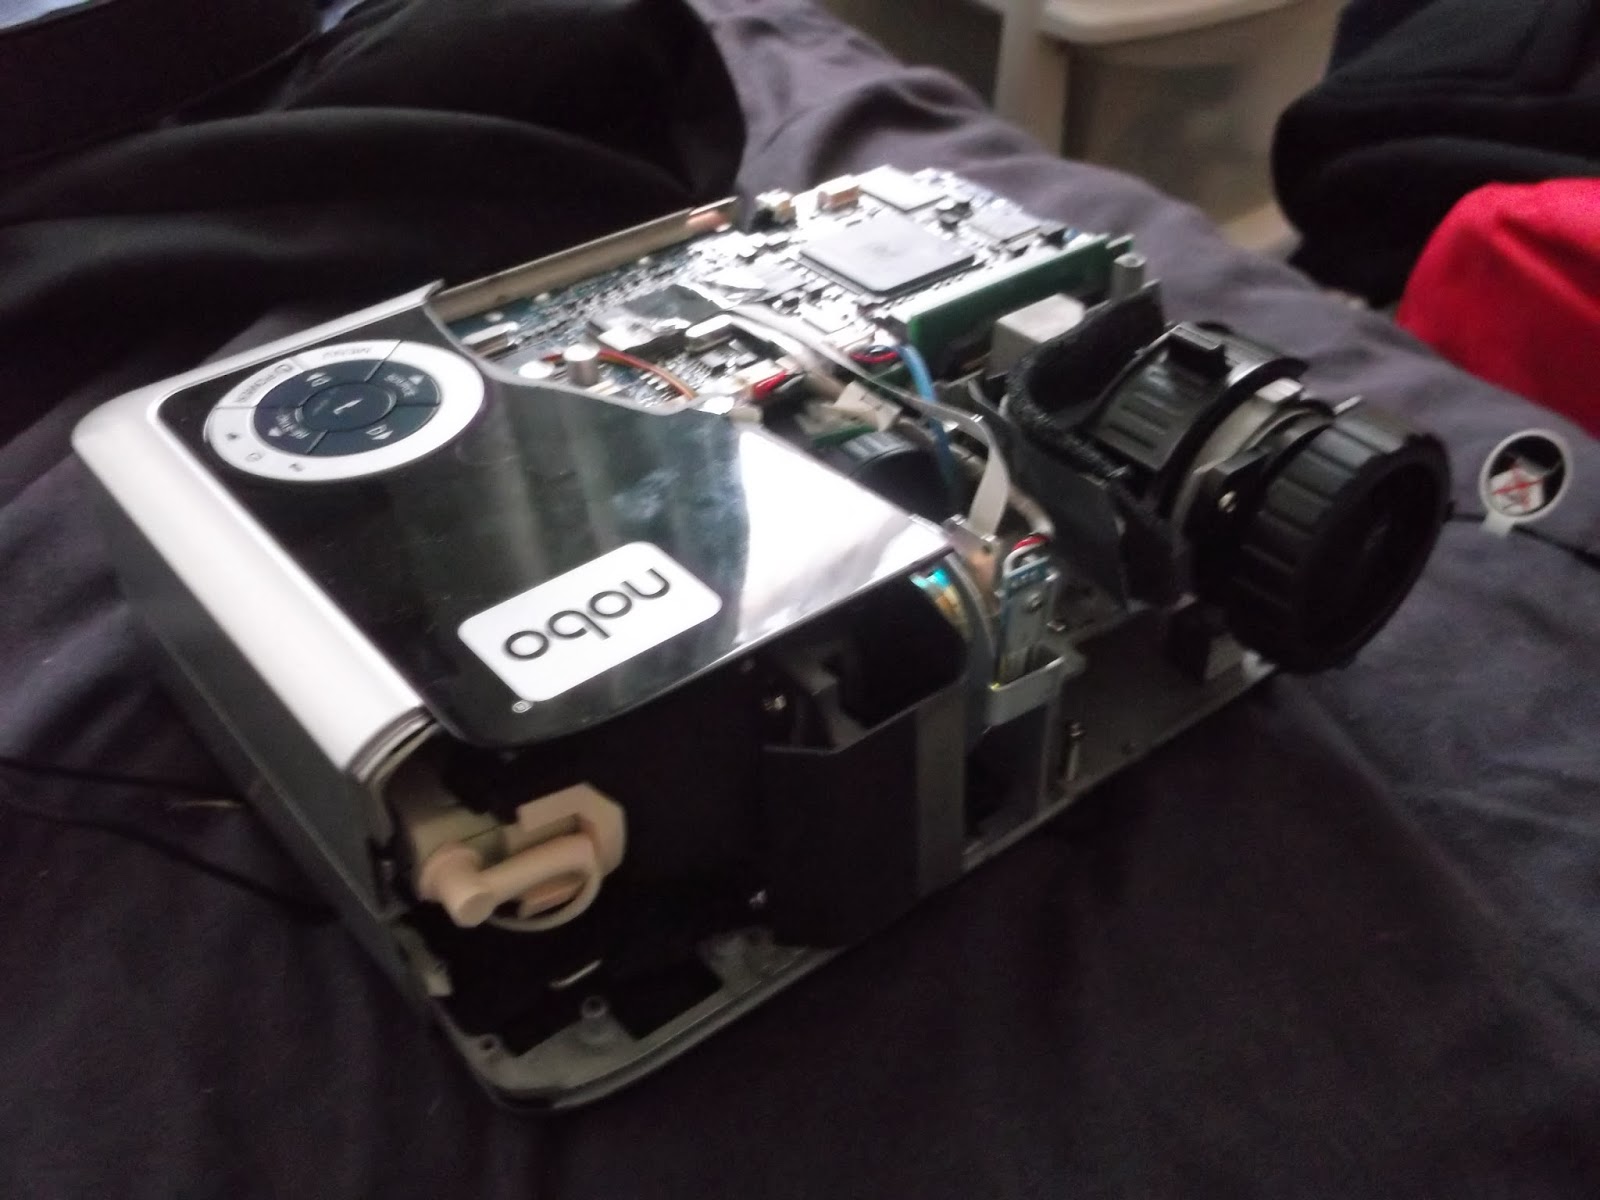
Turns out there was an embedded screw in the middle >:(
That was my attempt to disassemble the unit - you can hardly blame me when it contains more screws than the Titanic's rivet count but it wasn't all for nought:
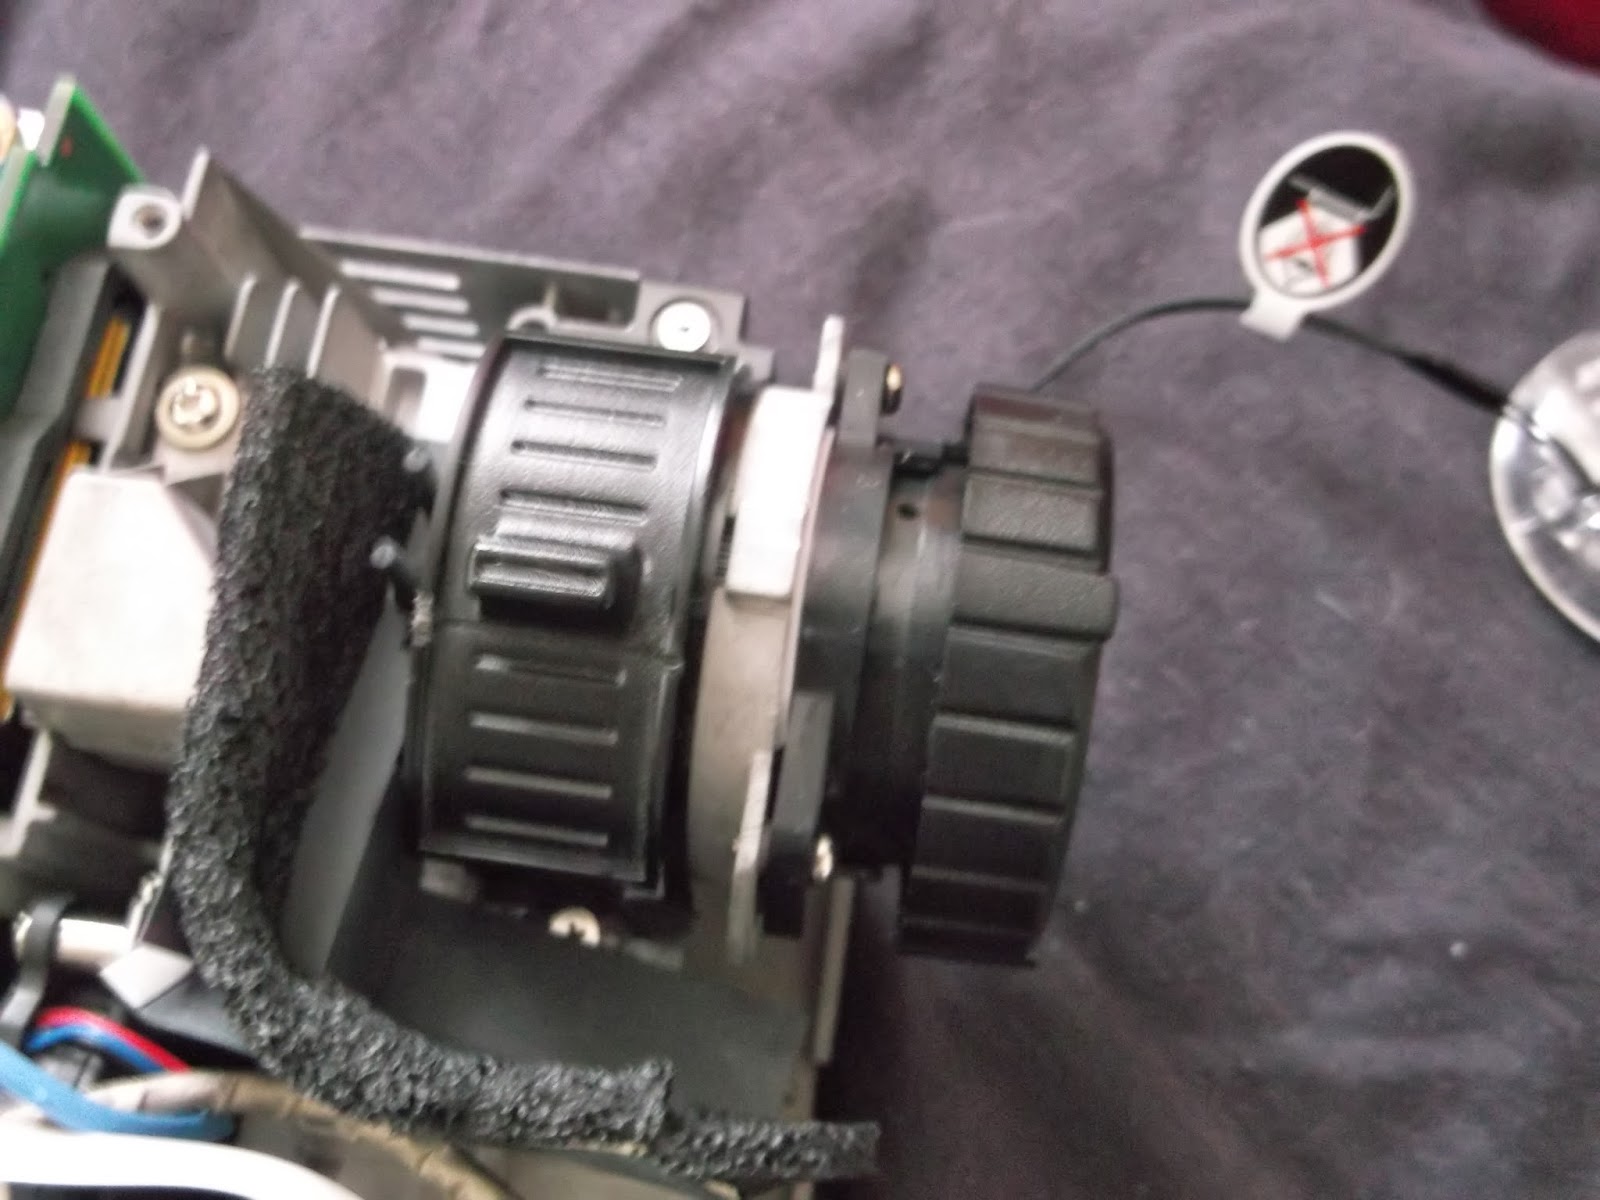
The focusing lens and the zoom lens exposed.
I discovered that you could undo a screw and set the focusing lens free, enabling focus at smaller screen sizes.  I also attempted to free up the zoom lens by sawing away at the slider but that was mechanically limited from going further.  Now I can get a focused image at 12.8cm x 8.0cm without a magnifying glass, and with the addition of a spacer where the lens is screwed in 6.4cm x 4.0cm will be possible.

I say that I'll need no magnifying glass because I decided to ditch the expensive DSLR lens (which probably wouldn't have worked) and play with some plain old magnifying glasses.  The aim was to allow an unmodified projector to achieve smaller focused images, thus potentially saving hundreds to experimental makers.  Being as efficient as I am, I'll parade some images of the results:
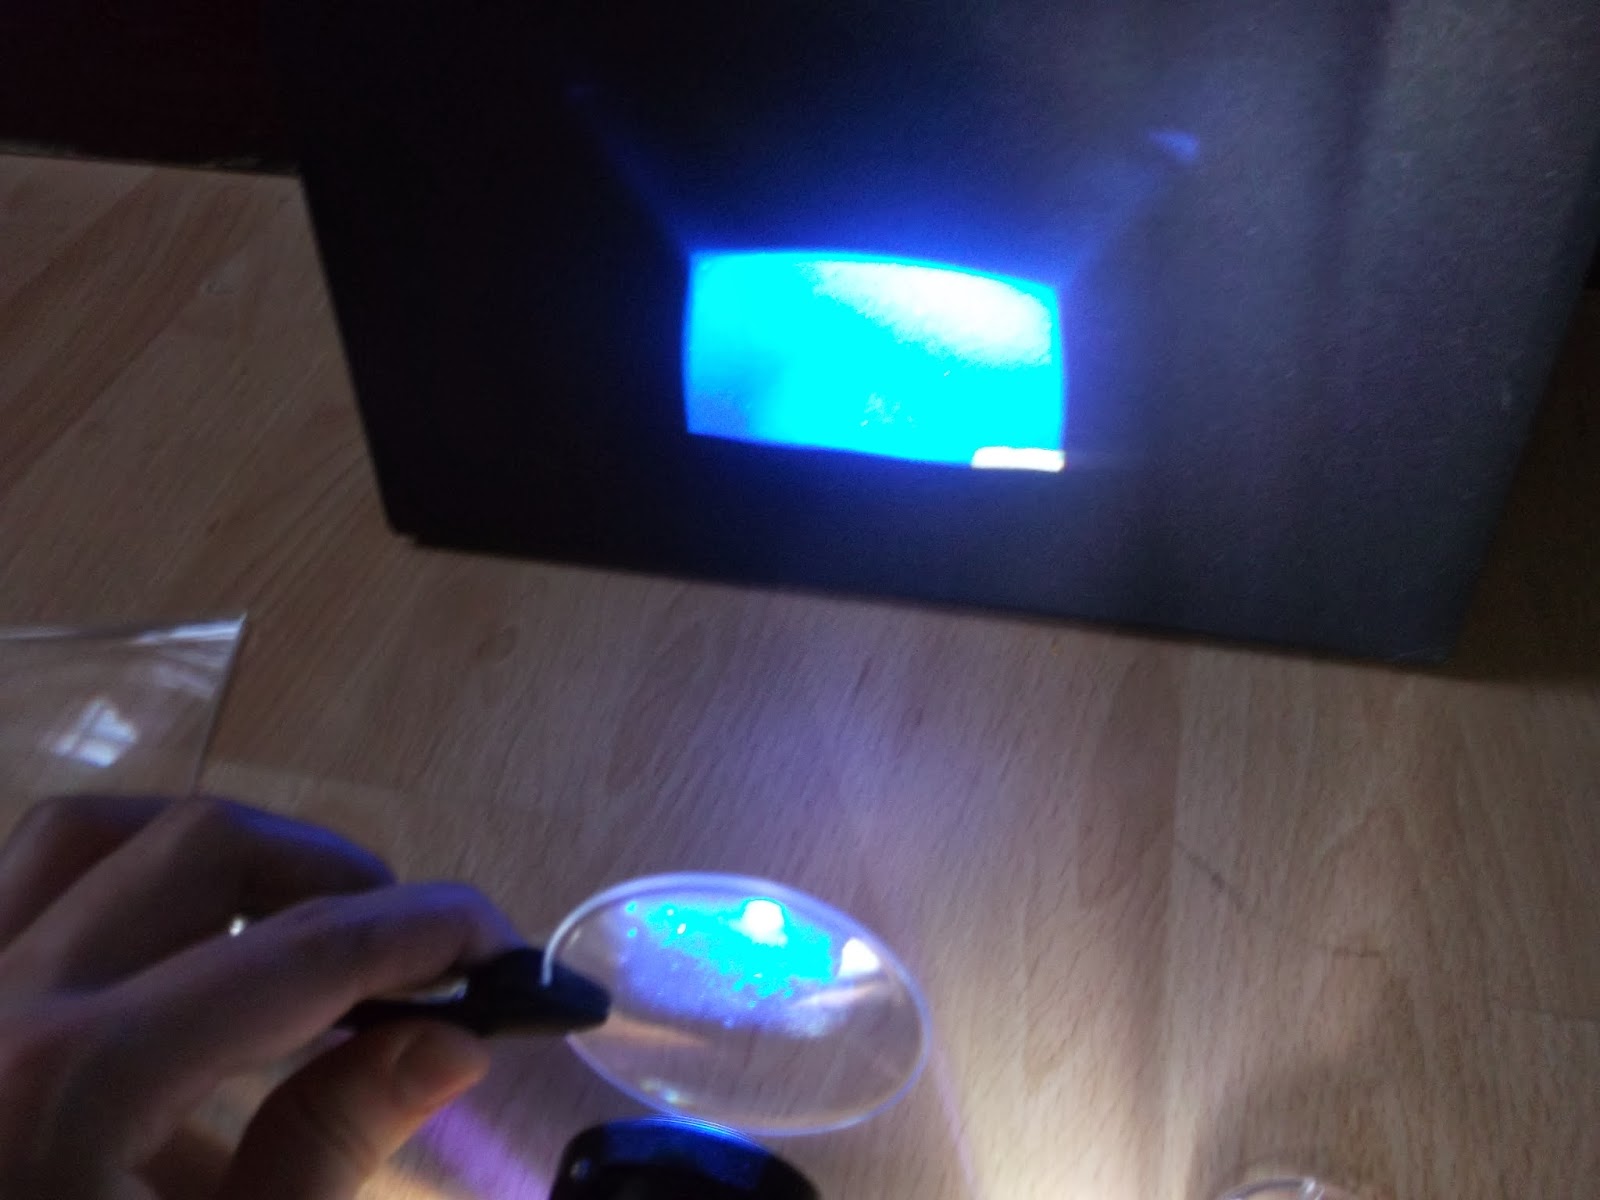
This 60mm magnifying glass sparked my interest in this experiment, it proved too small for a complete image.
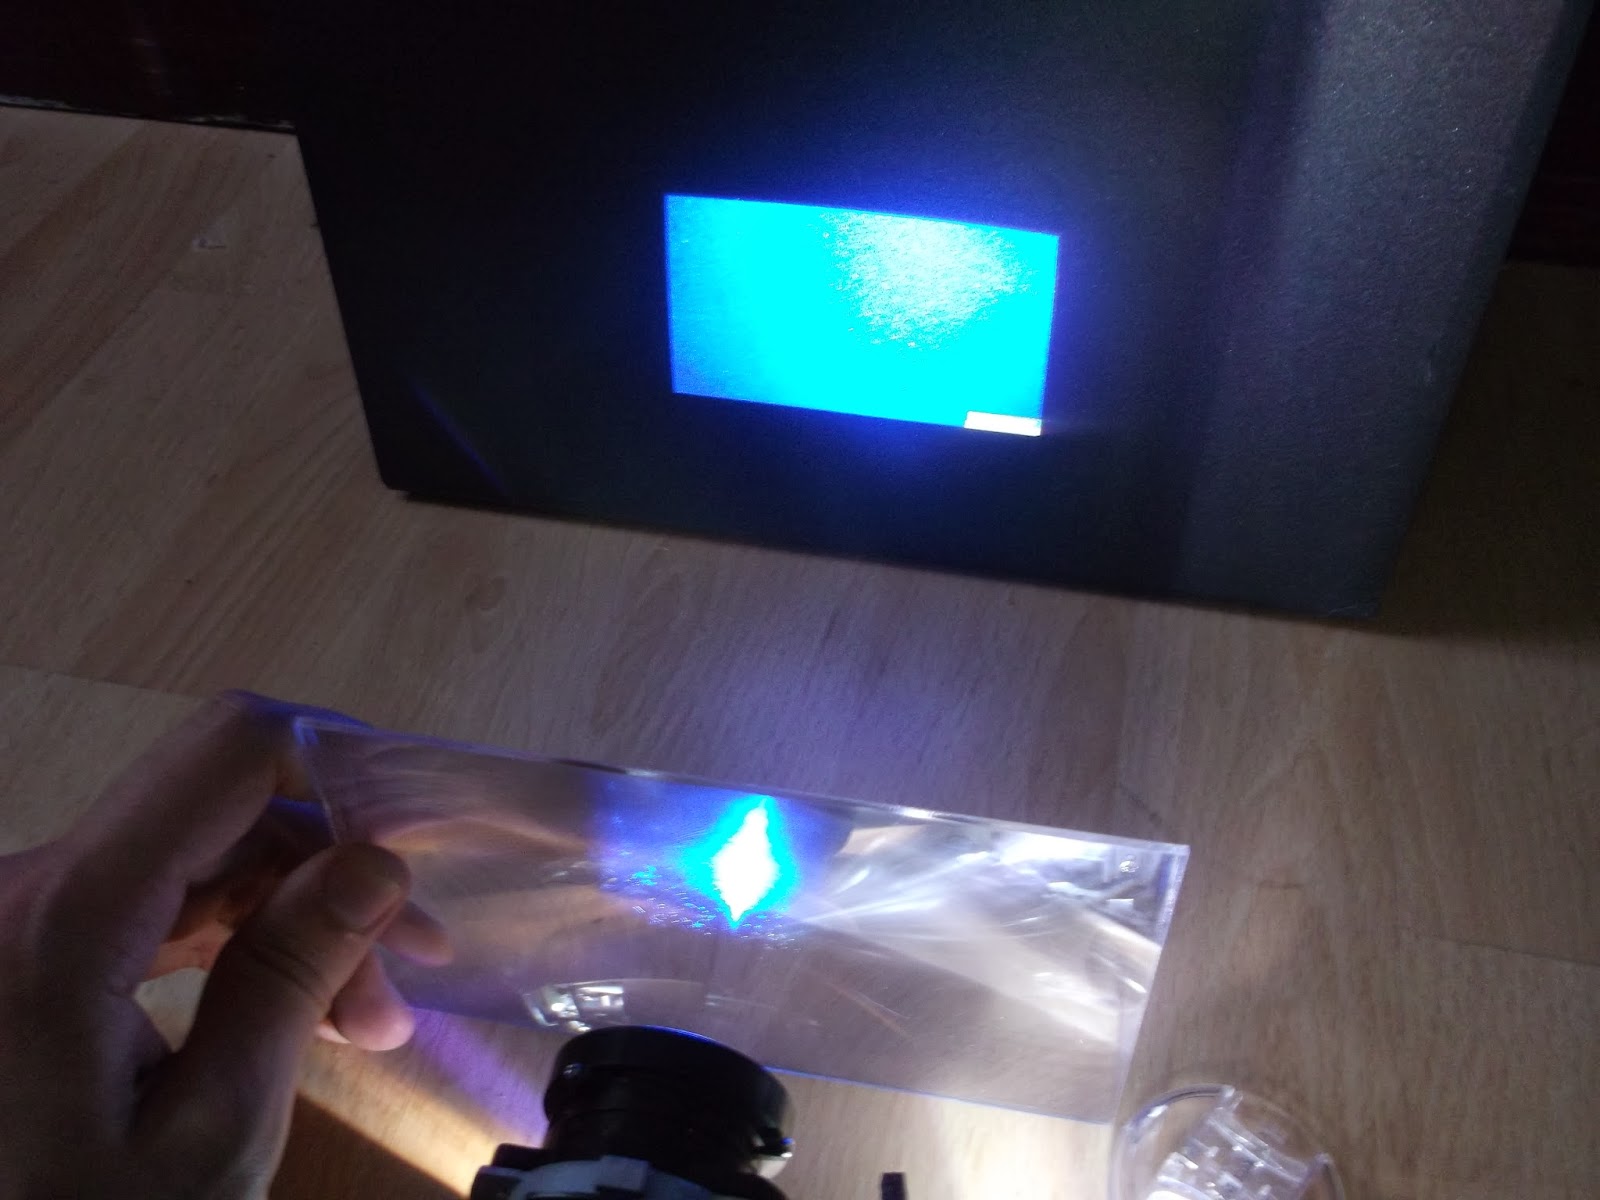
This glass dispensed with the rims, but had poor optical properties; all that was achieved was interesting image distortions.
Fresnel lens, used in reverse:  Almost, but not quite.
Fresnel Lens, used correctly:  Actually made things worse!
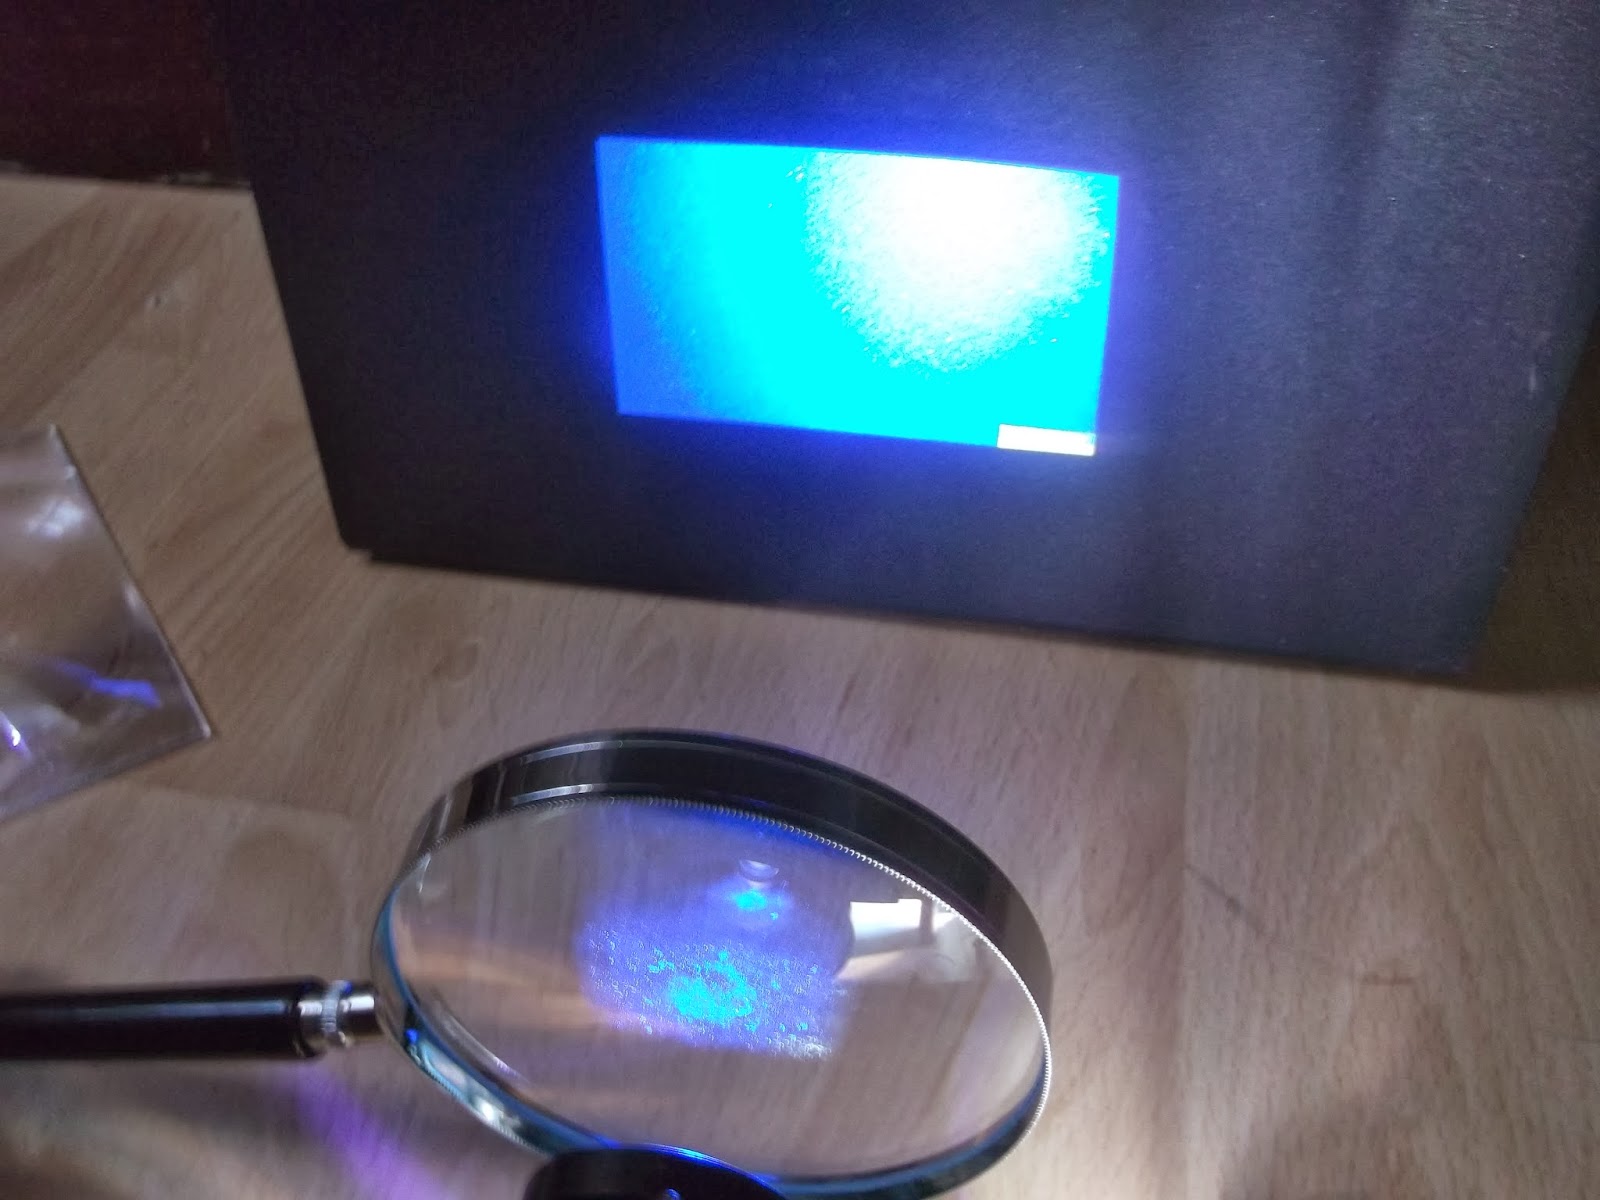
Quality 100mm Glass:  Actually proved best overall, but still some distortion evident towards the top - I couldn't source any glasses bigger than this.
As you can probably gather, what was needed was absolutely NO distortion of any kind, for the sake of accurate, consistent printing.  I believe that this is down to the image being set into the correct shape by the focusing lens, thus when another lens comes into the picture, the image bends inconsistently due to differing angles across the projection.  It seems that if you want to use a cheaper projector and still get tiny prints, or make a more expensive model work even better at such, you may need a tool kit and leave those gorilla hands at bay.

When I did get the projector to focus, I managed to assess it's ability to cure resin using an old Gü pot as a container, I am using Spot-GP from Spot A Materials, and the results are decent to say as much as I can at this stage:
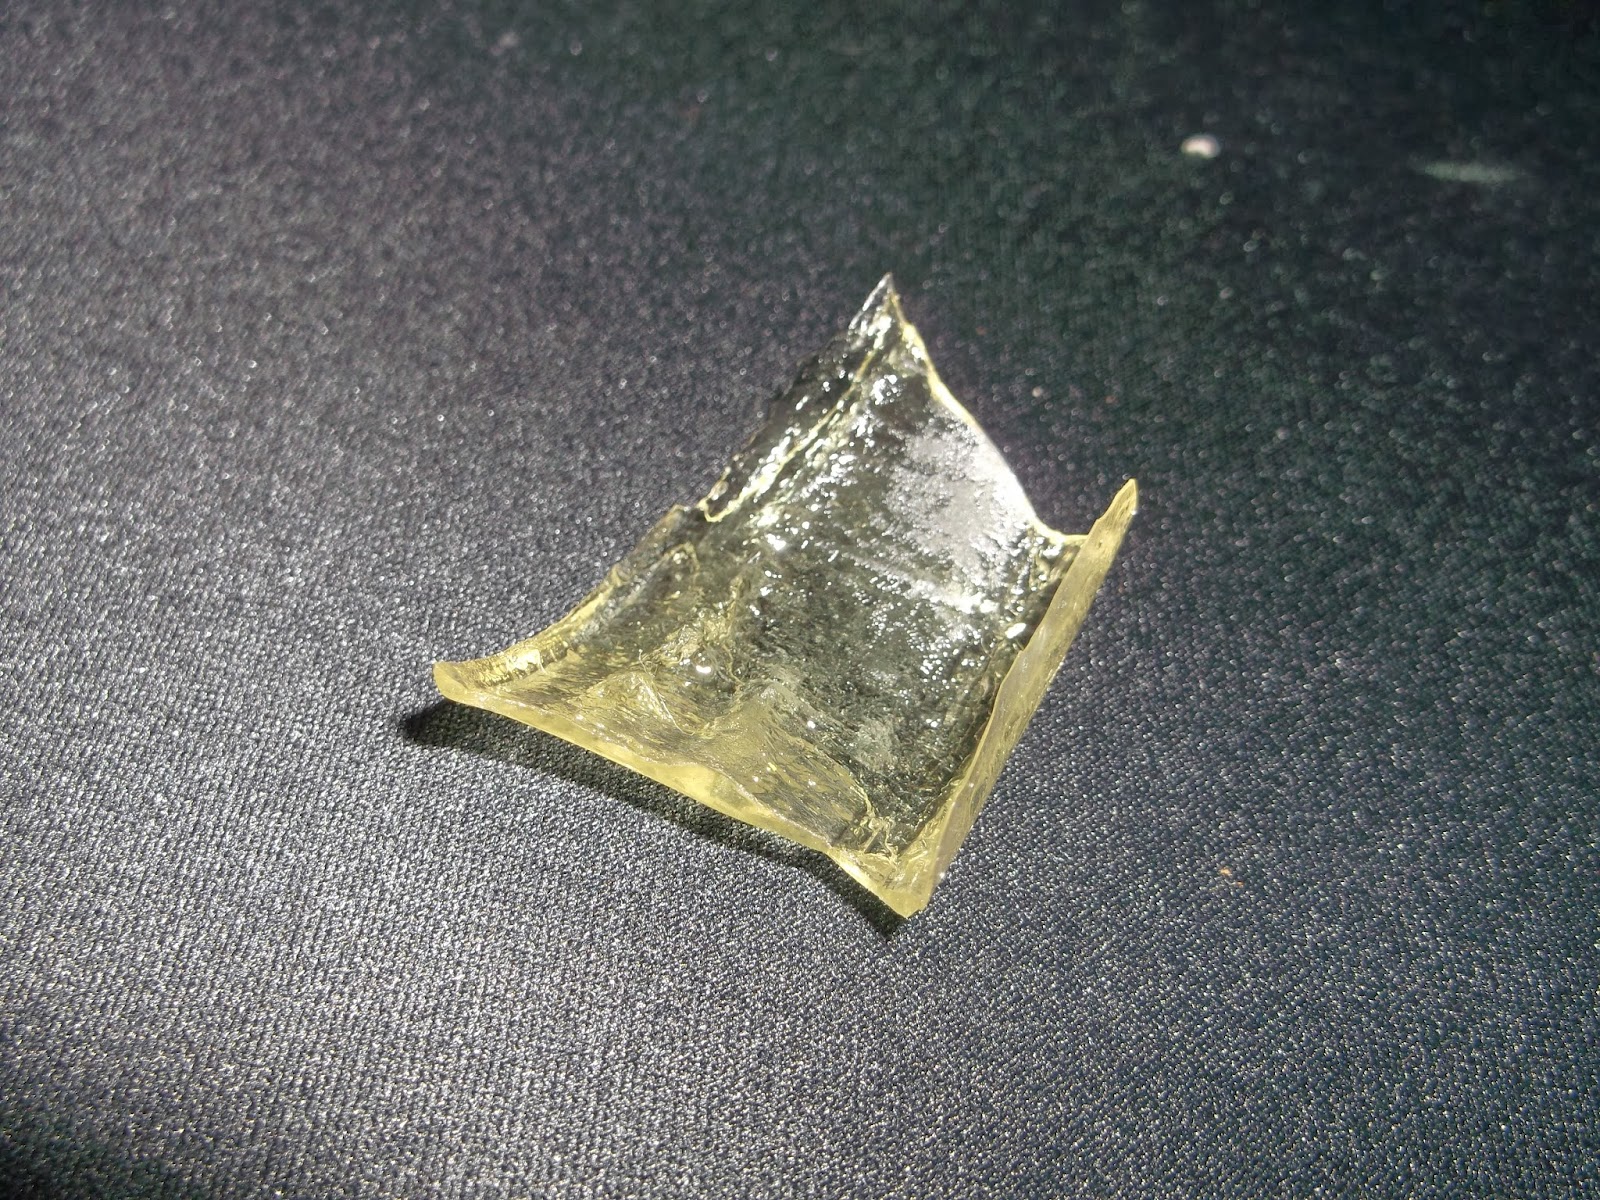
This shard is about 1mm thick on average, and It took around 10 seconds to form, so a 0.1mm layer takes a second.
As far as properties go, it's slightly more flexible than FUD from Shapeways, looks a bit like frozen urine and it closely represents FUD in most respects.  I only sort-of pointed the glass at the projector so ripples were to be expected.

Don't get me wrong, I have reservations about using these resin models structurally, so I have made progress on my Reprap Prusa Mendel i2 in aid of this; before the RAMPS board died (that'll teach me to buy down to a price) I managed to print a few 10mm cubes:
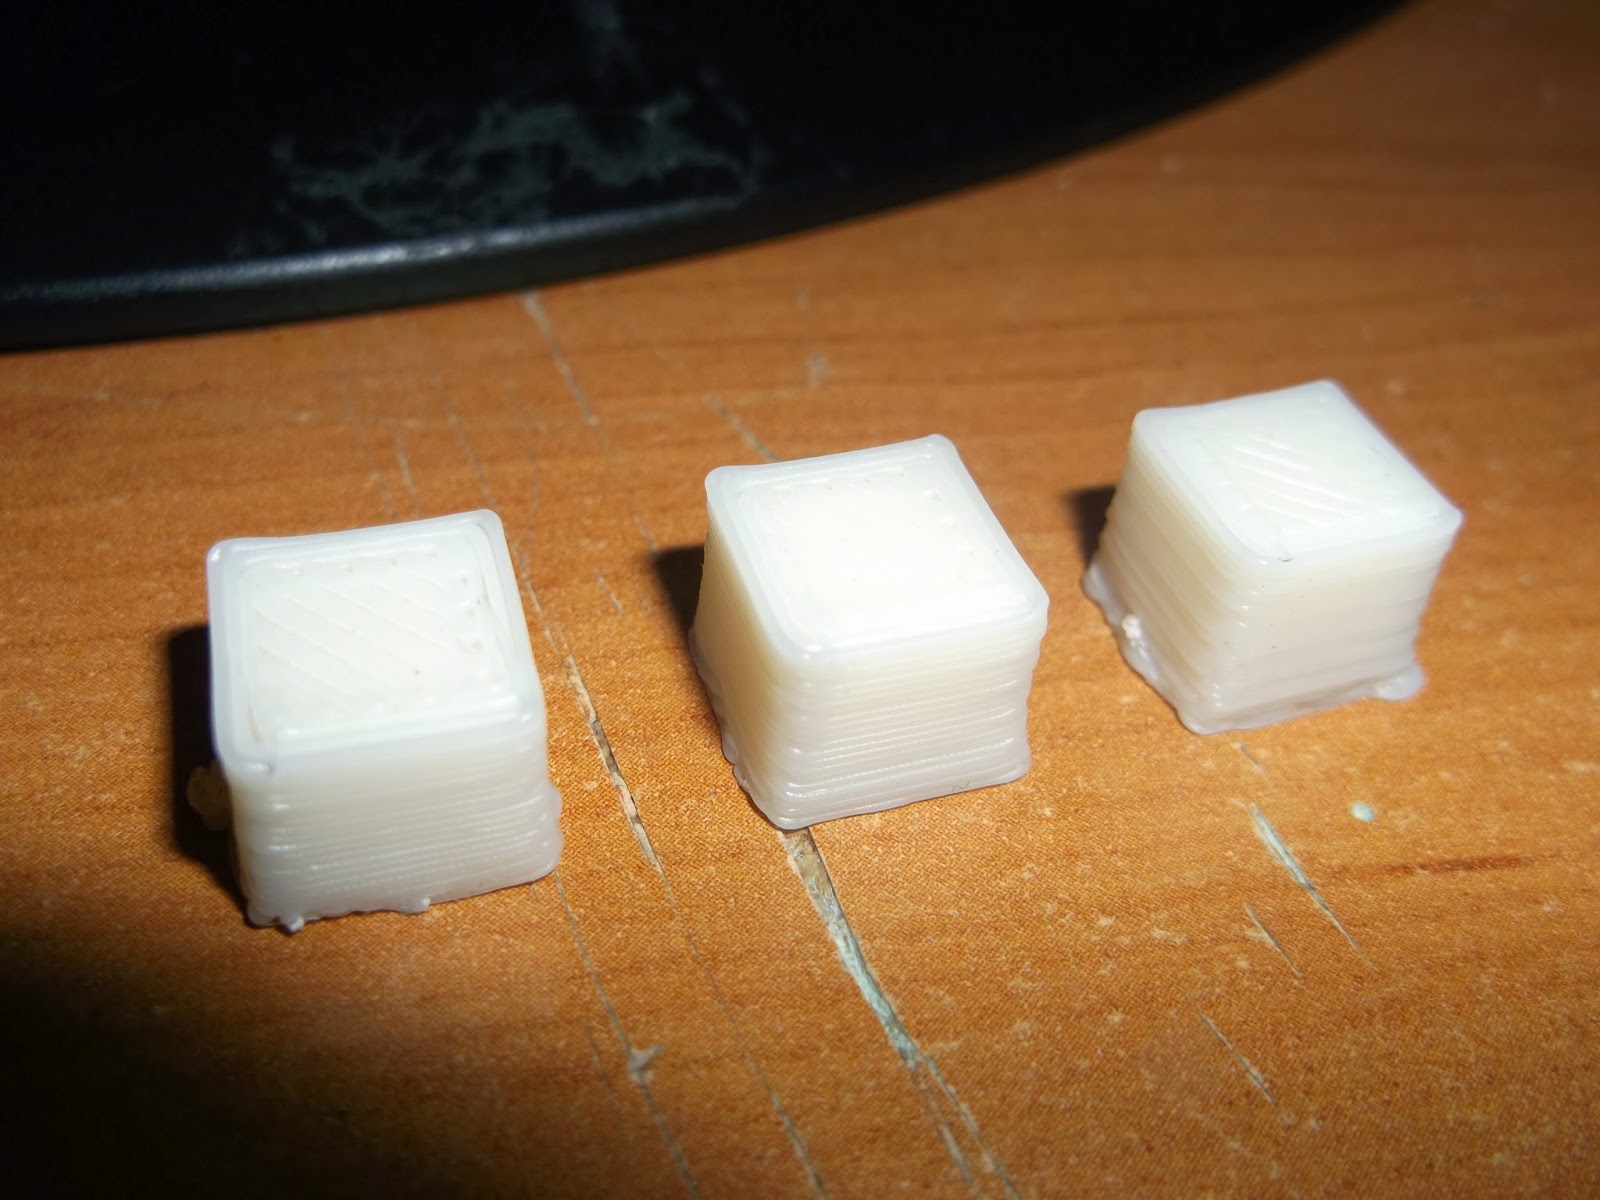
Left:  First successful print, 1mm short in Z, layers haven't bound properly.
Middle:  2nd Print, better, but X and Y axes differ and still 1mm short.
Right:  Best print yet, layers bind and X/Y ratio is 1, but still 9mm in Z.
I could never have guessed that calibrating Z in an FDM machine would be so hard - bed-leveling is bad enough, but I never want to touch the Z endstop again, ever.  It does give me an idea, though:  I could integrate the Z endstop into either the extruder or the bed in future builds, mount it via a nut/bot arrangement to allow fine adjustment as well as add a spring to alleviate backlash in the threads.  The Reprap is pretty much built, however, so it's a bit late to add that; guess I just have to get a monk patch from hair loss...

One final topic:  I've been investigating the onboard computer idea, and some guy called Torben Mogensen is creating a Pi-based controller for his printer.  This is still very much in beta, so I'll go via the simpler but more power-intensive route of adding an x86 PC to the case, which will run Creation Workshop.  I've liberated a PSU from my Main PC from an upgrade, a 700w model that should power all inside without trouble:
That tangle of cables concerns me...
That 700w is spread across 4 12V rails at 18A each, which may add up to 864w but the maximum concurrent draw is 700w.  This'll make things difficult but not impossible, 700w could power the projector as well if I had the confidence to disconnect the Power Supply from it.  Anyway, I have 2 outlines for the built-in PC:

Bespoke AMD Machine:


  • CPU = AMD A6-6400K Dual Core 3.9GHz with Radeon 8470D Graphics
  • Motherboard = MSI A78M-E35
  • RAM = 4GB DDR3 1866MHz to boost APU Graphics
  • SSD = Crucial V300 120GB

Shop-Floor-Bits Machine:

  • CPU = Intel Pentium E2160 1.80GHz Dual Core
  • Motherboard = MSI G41M-P33
  • RAM = 4GB Corsair Vengeance DDR2 1066MHz
  • GPU = Nvidia Geforce 6600GT 256MB
  • SSD = Crucial V300 120GB

The Bespoke Machine costs up to £260 with all ancillaries accounted for, while the Shop-Floor-Bits Machine will only cost £130 in the same condition.  Looking up performance figures on Passmark (great site), I get the following predictions for performance:
  • Format = Bespoke : SFB (% Difference, positive towards Bespoke)
  • CPU = 2400 : 996 (141% more)
  • GPU = 526 : 103 (411% more)
CPU is not so important as GPU performance in this case, since it will need to handle complex STLs in preview without slowing to a crawl.  The AMD system is only twice as much yet has 2.4X the CPU power and 5.1x the GPU power.  I've discovered that creation workshop will slice in seconds even on relatively slow CPUs like my decrepit 2.2GHz Turion TL-64 laptop.  The AMD system is more power efficient too, with a 65w TDP vs 65W+35W (CPU+GPU), or 100W.  The SSD is there for durability and speed, and the RAM is just enough for a smooth OS (probably Windows 7).

Thank you for reading this far, this was a big post and one I put off for quite a while, searching for a Graduate Engineering Job and prepping for interviews is a project in itself.  I'll see you next time, hopefully with some renders for the printer framework.

SLA 3D Printer Log 1: Projection, Projection...

In between dreaming of a house where model trains bring me pre-mixed Robinson's squash and keenly observing the cathartic tidal wave of backlash against Dungeon Keeper Mobile I have received a 720p projector from Ebay, costing £250.  Before launching into the specifics of how to use it, let's examine the unit itself.
The book is A4 width (and 2cm shorter lengthways) for comparison, and the unit weighs 1.13kg
The unit is actually 206 x 162 x 75mm (lxwxh), feels like a quality implementation despite it's low weight and is highly intuitive to operate; this isn't surprising when we learn that this model (Nobo X22PW) is simply a rebranded Optoma TW330, which is going for £410 at time of writing.  That is excellent value for money given that most projectors in that range will be 1024x768 native at most, not 1280x800 native (keep an eye out for native resolution, most projector sellers claim their model will "handle" 1080p, but this is done through upscaling and will make your movie look anything but sharp).


*Review Interlude*


The unit is surprisingly quiet in spite of the fan having to keep a 2200 lumen lamp from exploding (not a hint of facetious here), and that lamp gives plenty of brightness even on std-mode with 1700 lumens.  It is audible, but it quickly fades away during gaming since the noise has no irritating frequency (that goes out the window in bright mode, I suggest just turning up the brightness in windows).  Having played Medal of Honor: Airborne on it I can say that it eco-mode might not be to everyone's taste but with lamps costing around £90 I think most can sacrifice 29% brightness for 66% more lamp life.  This is also a Single-Chip DLP model so it suffers from a little colour separation during fast motion (highly noticeable when you shake your head viewing a black background); finally I would like a better contrast ratio than 2000:1 for more defined extremes in the colours, but I'm rapidly disappearing down a rabbit hole here.


*End Review Interlude*


Back to the point at hand, 1280x800 will allow for a detail level of 0.1mm per pixel for a build area of 12.8cm x 8.0cm; I'm looking for a minimum resolution of 0.05mm seeing as I design for FUD on Shapeways (0.1mm Resolution), giving a build area of 6.4cm x 4.0cm.  One of my ideas up to this point was to traverse the projector along a vertical rail, utilizing a redundant RAMPS axis to adjust the build area/resolution balance, but I forgot to account for projector focus; what's worse is that the minimum distance I could get the projector to focus was around 28cm, which gives an image of 197.5mm x 124mm - well above the 64mm x 40mm required.
Despite this, the brightness of the resultant screen area was highly encouraging.
In order to attain this build area, I need to add an adjustable lens with at least 3.0x magnification.  DSLR lenses can be had used for around £50, given that a UV filter is a common accessory it may be that the lens can transmit UV without hindrance, but apparently DSLRs have UV filters of their own and there may be some in the lens too - an optical testbed will be required to fully investigate the matter, as well as some actual 3D resins (no VOCs, please).


Free Ideas Bucket 1.0


I intend this project to be completely open-source, that means any and all STLs and diagrams related to the build will be available royalty-free and not on my Shapeways Shop; if *you* would like to sell it, go ahead but be prepared for a hard time making money given that the models are free and Shapeways can be used by a Bonobo.  Anyhoo, I present my current list of ideas:


  • A standalone built-in computer, either a Raspberry Pi, it's more powerful compatibles or even a full-on x86 PC.  This is to allow the printer to run without having to keep either my PC or Laptop running with it all night.
  • An ultrasound sensor to detect the resin level in the bath and adjust the build platform starting point to suit, this is only relevant to top-down designs.
  • A touchscreen on top of the machine, adjustable to either face outwards (for desk use) or upwards (for floor use).
  • Gullwing doors...  just because...
That concludes the first of hopefully many buildlogs to the SLA 3D Printer Project.  The ultimate aim is to largely free me from having to use Shapeways for every.  single.  solitary.  step.  in the R&D Process for Tawe_TMD.  It's always the way when you make something that you trip up on things you couldn't have predicted, but even if I flounder and fail, I can always watch Zero Punctuation across my wall.

SLA 3D Printer Log 0: Sirens of the 1080p screen, and the prints of reason.

As far as temptation goes, getting a new PC is up there with crisps positioned but a few feet away after 3 hours of CAD.  I say temptation because my current aim (and New Year's Resolution mind you) is to be able to subsist upon my own business alone - not to have to rely on a job to pay my bills.  I have already made inroads towards this with my Shapeways Shop Tawe_TMD but I've hit a snag:  Research and Development.

I am currently developing my first proper product, which is a Metropolitan Ex-Twin Brake Van from the turn of the century in N gauge (1:148); the body is pretty much sorted out, pending any minor alterations for functionality.  The chassis also pretty much looks like the final iteration, so the bulk of the work is now done leaving me with the R&D associated with functionality - and boy was I in for a ride!
Each one of those strips on the side is 0.1mm high by 0.25mm wide.
In the UK it takes around 3 weeks from order to delivery, in the latter stages of R&D (tweaking) this holds true even for minor changes like increasing the distance between the axle holes; this is doubly frustrating when a mistake is made, such as an item being wrongly printed, this being the direct inspiration for this post and the potential project I will get to in a moment.  Shapeways solved this issue with haste and care and I applaud them for such attention, however, I consider it a call to action for a proper solution.
That solution is my very own SLA (Photo Lithography) 3D Printer; this isn't as difficult as it sounds, because according to many Youtube videos and This Instructable, it is entirely possible to print a 3D object using nothing more than a Z-carriage, a beaker of resin and a DLP Projector.  Feature sizes can be minute, too:  a 1280 x 800 DLP projector (£250 from Ebay) can result in objects up to 12.8 x 8 cm in size with a resolution of 0.1mm in the X and Y; you can even get higher resolutions simply by reducing the distance between the Projector and the resin (e.g:  6.4 x 4 cm with and XY res of 0.05mm).

I have made a not-terribly-professional case study into this idea and found some interesting facets to the idea of running a 3D printer like this:
I was never noted for relishing writing novels...
For the record, here's some additional information for those looking to check all this out (I did this on many assumptions):
  • 1 Metro Brake Van = 2656 mm3
  • I set a budget of £200 for materials, this includes minor electronic items like stepper motors, and any 3D prints for special parts.
  • I don't know what I will coat the build platform with, but it will need to hold things during printing whilst peeling off when done.
  • I assume Council Tax to be included with the Rent.
  • Food + Taxes is broken down thus:

  1. Food = £30/week or £120/month
  2. Income Tax = £38.12/week or £165.19/month from here (assuming gross earnings of £15,000 a year)
  3. The rest is for other things like electricity, gas, water which I can't be stuffed to calculate, but the remaining £164.81 should cover it

  • As for printing, I am assuming a perfect run of setting up supports (SLA prints need copious support material, maybe not in the case of the Metro Brake but I'll apportion it anyway), a successful print owing to a reliable non-stick application (that's what the Sylgard 184 is for - It stops the print from adhering to the resin basin in bottom-up designs), and finally a flawless post-processing run (fat chance...).
It is quite clear to me that running this printer to print Metro Brake Vans to sell is not a viable proposition - even with sufficient resolution, the time spent in preparation will ensure absolutely no free time, an unacceptable situation when this business is intended to help me achieve financial freedom.  3 hours per print sounds low compared to 3 weeks, but remember that Shapeways is taking on all the work in those weeks, and I am free to make new designs while my Metro Brake goes on sale.  This printer makes much more sense for Functional Testing, i.e:  making minor changes around the coupling area or testing strengthening ribs.

To any aspiring Shapies, I say this:  If you have passionate pride in your work, be prepared to test and test and test - go so far as to intentionally break your redundant testing models to reveal weaknesses.  On the note of final presentation, don't be like many of the modellers on this virtual superstore of human creativity and only upload the STL with some token renders; this really shouts "That'll do, next!", and is that the attitude you would tolerate from a carpenter?  An engineer?  A NEST team?  One of the best ways of showing that you have done such testing is to upload a Youtube video that will show it running.


I hope that PC temptation doesn't get the better of me...

Introduction to Tawe TMD

Hello, my name is Stephen Sparey (B1t5yn8tr is my online name, also a blog which is not necessarily safe for work detailing my more general exploits).  I am the one-man head of Tawe TMD, an operation that derives it's name from the Tawe Valley, in which lies Swansea and the University I got my Foundation Degree at.

This blog is intended to provide a dedicated outlet for my operations specific to Tawe TMD; Facebook is very limited in terms of what it can display, only one image is permitted per post which is severely curtailing in terms of explanation.  I would also like to separate this material from my main blog in order to allow people to view the progress on my SLA 3D Printer without risking NSFW material showing up (I'm no angel by any stretch of the word); I predict some people will view it at work to kill the last 10 minutes.

I will add a link to my main blog for those who seek demented experiments (like making a Graphics card cooling shroud out of paper, that didn't end with dignity...), All SLA 3D Printer posts from there will be moved to this site, as well as a few Tawe TMD related posts.